Red Lips and Cat Eyes

by Ariyana Kylstram, First published for the November/December 2011 issue of Finery
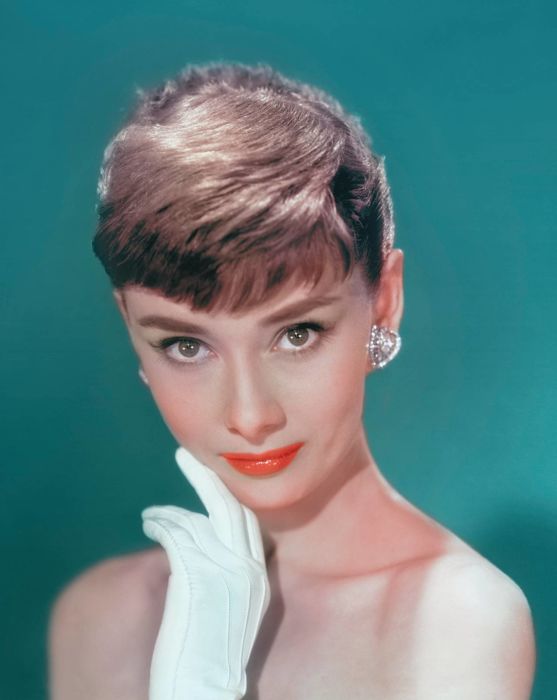
What do Elizabeth Taylor, Marilyn Monroe, Audrey Hepburn and Grace Kelly have in common? They were all different faces of beauty during the 1950s, and each used two common techniques to give herself the hallmarks of 1950’s beauty: red lips and cat eye liner.
Elizabeth Taylor was the voluptuous brunette beauty, and Marilyn Monroe her voluptuous blonde counterpart. Audrey Hepburn and Grace Kelly typified the more slender, natural brunette and blonde looks, respectively. Yet still, look through pictures of all four and you will find the same well-defined red lips and catlike eyes on all of them.

But I couldn’t possibly look like them, you say? Of course you can! How? We’ll break it down.
The first part of the look is a smooth face. In 1938, Max Factor introduced “Pan-Cake”, which was a foundation sold in a cake, and applied with a dampened sponge. Pan-Cake was designed for movies, and gave women the appearance of perfectly smooth skin, without blemishes or wrinkles under the powerful lights of a movie set. For a modern recreation, I recommend a smooth liquid or cream foundation that matches your skin tone or lightens it only slightly, followed with a matching concealer. Use a makeup sponge or foundation brush for the application of foundation – you will be painting this on, and you want a very even layer. After the foundation, apply concealer wherever it is needed with a small concealer brush or the most delicate of fingertips. You will need to set all of this with translucent powder. I highly recommend a large fluffy brush or a big puff for the powder. At this point, you will have the base of the mask upon which you can create your beautiful face, and yes, you may think you look un-natural. Be patient.
Now, we work down the face from top to bottom, starting with the brows. Run a few image searches on any of the lovely icons named above, or on your own favorite stars from the 1950’s; you may notice that most of them had very shaped brows, which extended the natural brow length out and down. I think of this shape as being like the top edge of a bird’s wing, an arch which comes to a soft point before heading down and defining the outer edge of the brow bone, nearly to the level of the outer corner of the eye. To accomplish this yourself, I would recommend beginning with a brow pencil which matches your coloration, and making short, 1/8″ strokes to draw in hairs in any gaps where yours don’t grow naturally. This technique should define your shape. Follow with a short angled brush and a matching eye shadow powder to completely smooth the shape, taking care to make a clean shape from the inner to the outer edges, both on the top edge of the brow as well as the bottom edge of the brow. Clean up any stray powder or pencil with a cotton swab.
The eyelid appears to be bare, but don’t let that fool you. You should at least have laid down a layer of foundation, possibly concealer, and certainly powder on the brow bone and lid in the foundation step, and now you may choose to apply a bit of shimmer or a subtle, neutral color with a shadow that is close to the skin tone (an ivory on a very pale woman, or a light shell pink perhaps). Apply your shadow to the lid and crease, and use a soft blending brush to feather the shadow up onto the browbone so you have no harsh lines visible.
Next comes your eyeliner: it should be sharply defined, and black. You may use a liquid liner that has a felt-pen/calligraphy tip, an angled brush and a pot of eyeliner gel, or even create your own liquid liner using a soft powder shadow and water. Be warned that it is difficult, but not impossible, to achieve these results with a liner pencil.
Stabilize your eyelid with a fingertip dabbed in powder, and use your dominant hand to first lay down a narrow line right against the base of your lashes. You may need to repeat this step until this line is complete and has absolutely no gaps. Once the lash line is filled in, overlap a new line (with a freshly dipped brush) on top of your original line. Your new line will be thin near the inner corner of your eye and widen towards the outer corner. Finish off just past the outer corner with a nice crisp “cat eye” point. Note that the proper way to draw a cat-eye will be to tip the line “up” at the outer corner of your eye – this looks like “up” as you draw it, but will be the right effect.

Now take some time (30 seconds!) to relax your eyelid after applying the liquid. Keep your eye half closed, and look down towards the floor. Focus on something interesting and be patient. Nothing is worse than smearing fresh liquid liner.
After your liner is dry, finish your eyes off by curling your lashes (yes, this is important) and applying a generous, but not sloppy, coating of black mascara. It’s much better to clean your mascara brush well and put on 2 layers of fairly-dry mascara than one heavy coat – just like paint on a wall! Use an eyelash brush or a spoolie brush to separate lashes that clump together; the look is made up, not clumped-up!
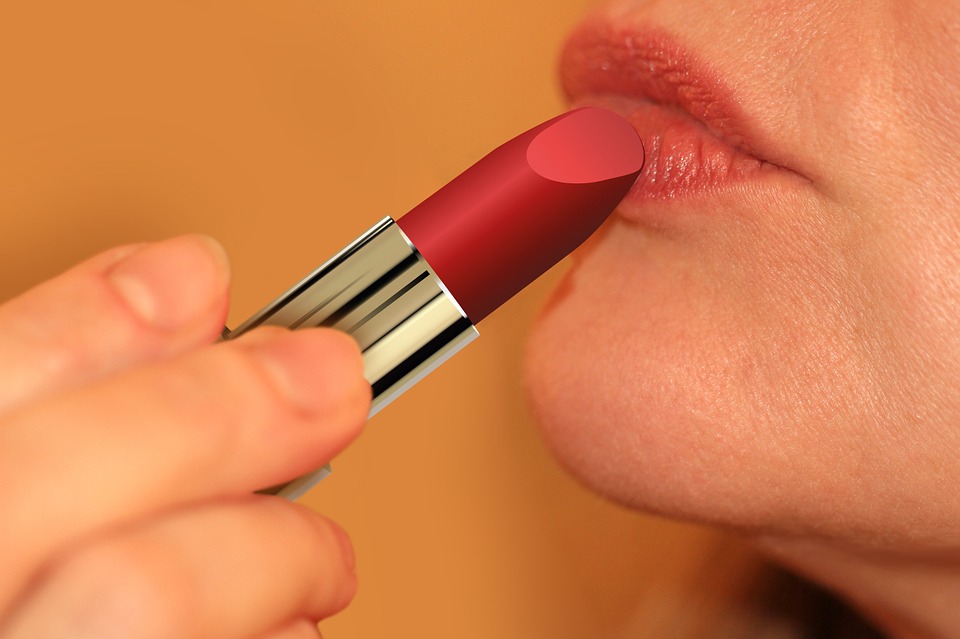
Once you have a good pair of cat eyes, all you require is a pair of beautiful red lips to complete your look. Powder the lips lightly, and either line just outside the edges of the lips with a skin-toned lip liner, or apply a bit of concealer to at least the edges of your lips, blending it inward with a medium sized, stiff brush. You want to mask the natural lip line and give yourself a blank canvas.
Next, decide what shape you want!
If you’re going for Marilyn’s lush look, take a neutral red lipliner (which matches the lipstick you want to use) and line slightly outside of your natural lip line all the way around, diving the line in towards the corners of your mouth at the last minute. This will give your lips an extra-full and lush appearance. Study photos of Marilyn, and you’ll note that her lips seem to be barely-contained by the corners of her mouth, and that her lip color carries all the way in to the edges.
.jpg)
If you prefer Audrey’s more subtle line, follow your natural lip line, or even line just inside of your natural line. In all cases, make sure your line comes to a point just inside the corners of your mouth, and that the lines for your upper and lower lip meet. Pay attention to getting a smooth line from the center curves along the straightaway to the corners of your mouth, both top and bottom.
Now, fill in your lips with the lip liner, as though you were coloring them in with a crayon. Take your time; this will produce an excellent matte color base. Layer lipstick over this base carefully, using a lip brush with a nice stiff edge to get a really crisp line.
Finish by blotting with a single sheet of tissue (pull your Kleenex apart into its separate layers), and you are done!
Leave a comment