Pattern Review: The One Hour Dress

by Carol Wood, First published for the May/June 2012 issue of Finery

So, you want to get dolled up for the the Gatsby Picnic or Fiddles and Roses? Maybe you just want a pretty little somethin’ somethin’ to slip on for a special occasion? The clock is ticking, so you think, “Golly, there’s that pattern for the One Hour Dress – that’ll do the trick!” But wait: Have you ever attempted the One Hour Dress?
Five will get you ten you’ll need more than an hour for this little lovely. I am a very experienced seamstress (trained, even!) and it took me three hours to get the job done. Granted, I spent time snapping photos and taking notes, but the steps aren’t as intuitive as I had expected, plus there are strange instructions without clarifying diagrams. Please: budget more than an hour!
The project started with the pattern itself. I own quite a few of the Woman’s Institute of Domestic Arts & Sciences booklets and materials that helped sewers hone their craft between the World Wars. “The One Hour Dress” a booklet with instructions that allow a sewer to construct a simple, yet classy dress without a pattern by dividing fabric amounts, folding, cutting, and stitching. I don’t have an original of this 1923 booklet, so I downloaded it from http://www.onehourdress.com/
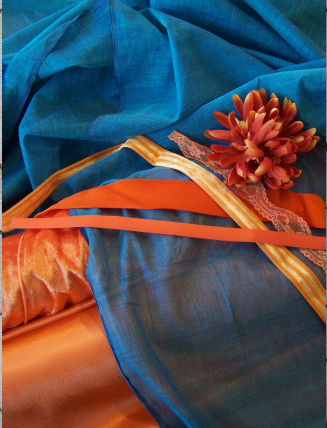
I read the instructions a couple of times, then gathered up my materials: 3 ¼ yards of turquoise-navy shot cotton batiste, orange cotton bias binding, vintage orange rayon velvet ribbon, and a silk flower. For the slip, nothing would do but orange poly crepe-back satin and orange lace. I prepped everything so that I could start the clock without having to press fabric or load bobbins. With Django firmly inserted into my CD player, I started in.
First, I logged the appropriate measurements: blouse length (neck to blouse/bodice finish mark,) skirt length (blouse/bodice finish mark to hem,) hip measure (location where blouse/bodice finishes,) and armhole measure. You have to remember that this pattern was published at a time when “normal waist line” was lower than the anatomical waist. So, when the blouse length is based on the measurement from “a little below your normal waist line” in front, up across the shoulder to a corresponding point below the “normal waist line” in the back, you might end up with the bodice being too short or too long – depending on how you measure! I had to guess at my model’s armhole and skirt length since I had only requested bust, waist, and hip measurements. Adventure afoot!
Only while separating the fabric into 1/3 blouse and 2/3 skirt pieces, did I notice that I had chosen the fabric poorly. The pattern recommends fabric without a definite up and down, so I thought this solid would suit nicely. However, because it’s a shot, the sheen is quite different on the straight and cross grains. I wanted to retain the same color from blouse to skirt hem, so I had to set the pieces for the skirt on straight grain instead of following the instructions and setting the skirt pieces on cross grain. My first modification of this pattern!
Cuts I needed to make for the neckline and side seams + sleeves were interesting! They are based, for the most part, on folding the bodice fabric lengthwise then crosswise and making fairly precise measurements. However, I had neglected to note that I would have to refold the fabric first crosswise then lengthwise for the side seam + sleeve seams and nearly ended up with sleeves down center front and center back! (Lost yet? These tips make more sense when you’ve read the booklet.)
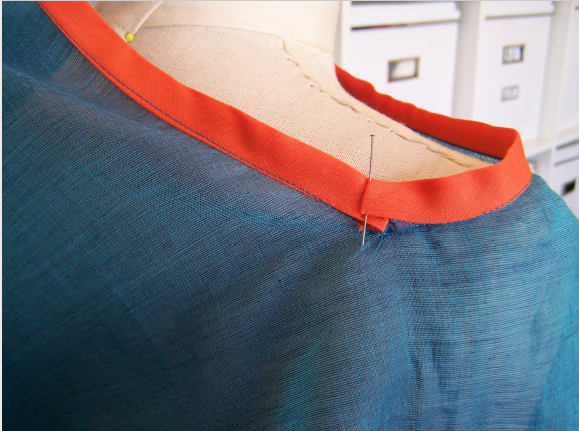
Bias binding can be your friend. That is, if you don’t have to curve around weird corners! The neckline is to be bound in two pieces based on the diagram, although the instructions don’t mention that. The instructions also don’t point out that you have to do some pretty fancy maneuvering in the corners at the shoulders to get the bias binding to meet up. I ended up having to make a few hand stitches on the inside to get the binding to stay put nicely. The instructions also don’t tell you that when you join the underarm seam, you’ll probably want to flip under and stitch down the flapping bias binding at the cuffs.
Attaching the skirt bits front and back to the bodice front and back was a cinch. You’d think stitching the sleeves under the arms and down the side seams to the end of the bodice would have been, too, but the instructions don’t mention leaving a seam allowance’s worth of the bodice unstitched so that you can turn under and finish the skirt bits that, when finished, look like cascades down the side seams. The corresponding diagram in the booklet shows this, but then the next diagram has the proportions all wrong for the side seam finishes. Oi! This I figured out.
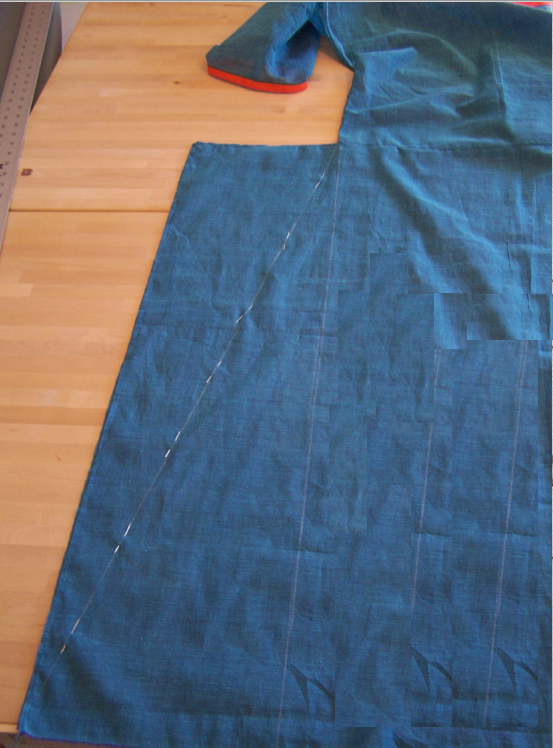
However, I still don’t know how the skirt is supposed to be measured for side seam finishes – at this, I guessed. According to the instructions, the wearer is supposed to have the dress on while pulling the front of the skirt up to the waist (or hip,) then pulling the back sides of the skirt through the wearer’s legs to then pin so it can be stitched. What?? Thought I’d just stitch from the waist down for side seams and be done with it, but then my model wouldn’t have been able to walk. So, I ditched that chalk line I had originally drawn based on the instructions for a diagonal from hip to hem for a slight flare at the hem.
Three hours later, I had a lovely 1923 gown!! Then my model, Maggie Waterman, showed up. What a beauty and so easy to fit. She slipped on an early 1920’s brassiere, the shiny orange satin slip, and then the One Hour Dress and voila! Mint julep, anyone?
Editors note: This is based on a similar article the author wrote for the February 2010 issue of Yipe! e-zine

Emilia Rosa
I simply love the colors you chose! The dress looks gorgeous!