Check-In: 9:30 am – 9:45 am
Session 1: 10:00 am – 11:30 am
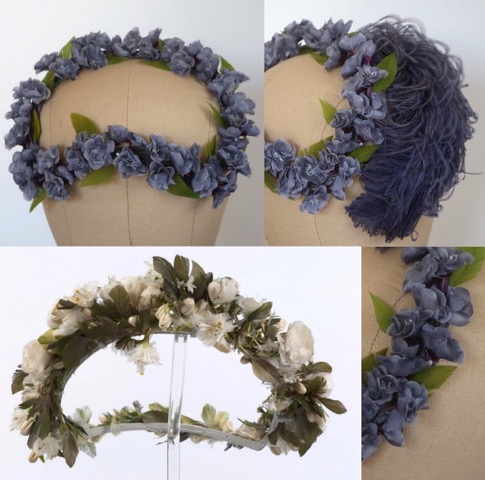
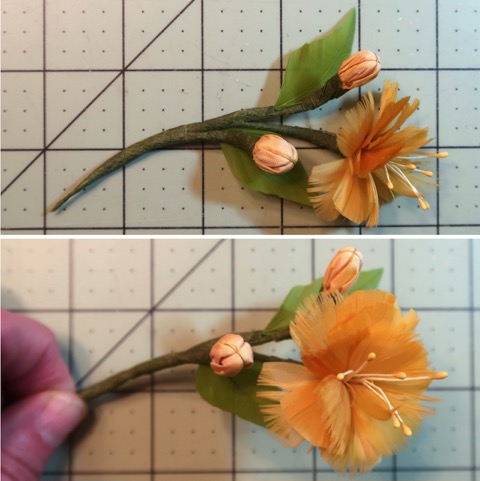
The students will prep a frame, make feather flowers, feather leaves and buds to add to the frame. Note: making the flowers does take a while and you might not finish the entire frame in the class but we will cover all the steps in class.
Instructor: Lynn McMasters
Instructor provides:
- “How-To” PDFs.
- Kits for those that want to make the headdress with silk flowers and feather leaves: buckram, wire for the frame, green feathers for feather leaves, some printed labels for cutting out leaves – $4 + $4 (shipping)
- Kits for those that want to make all their flowers from feathers: buckram, wire for the frame, green feathers for feather leaves, the feathers you will need to make your feather flowers, some printed labels for cutting out leaves and petals, forms for making buds – $10 + $4 (shipping)
Student provides:
- Sewing kit
- 12” sq of a thin fabric to match the feathers to cover the frame and make buds
- Scissors that cut well at the tip
- Ruler
- Fabric tac glue (BEACONS)
- Fine wire ~30 gauge
- Florist tape in a green to coordinate with the green leaf feathers
- For those wanting to make the headdress with silk flowers you will need 50-60 ~1” silk flowers with wired stems
Join me for an afternoon of hands-on crafting! This project will combine many different media types for a unique accessory-making experience. End the day with a (mostly) finished fantasy Russian tiara of your own design!
Instructor: Kelley Levinson
Instructor provides:
- Emailed directions/walk through
Student provides:
- Basic thick headband in any color
- Craft wire/jewelry wire
- Thick, stiff felt in any color. This is the base of the kokoshnik.
- Tacky glue or hot glue gun
- Model Magic, white preferable but any color will do. 4oz pack is $3.50 from Target.
- Set of basic acrylic paints. Small tubes will be fine! These can be found at Walmart/Michaels anywhere from $10-$20.
- Beaded necklace. Can be from Dollar tree/wherever you find it. Any color of your choosing.
- Any random details you’d like to add! Trims/lace/ribbon/beads/embroidery scraps. Use your imagination! This is a great stash busting project!
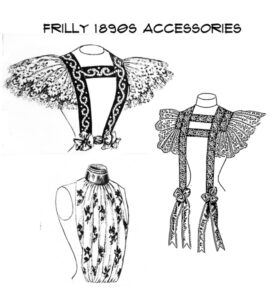
Take your 1890s costumes up another notch or dress up a basic dress with 1890s flair. We will be making a belt and two mix and match false bodice front/plastron decorations.
Instructor: Chang Meng
Instructor provides:
- Patterns
- Class notes
Student provides:
- Fabrics and notions as described in the class notes
- Sewing machine (but hand sewing is doable too)
- Cutting the pattern pieces in advance would be great.
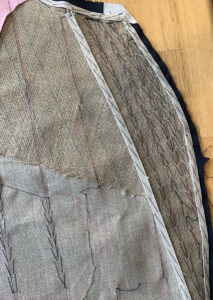
Learn all about the many joys of pad stitching! Want to puff up your chest gentlemen? PAD STITCHING! Fusible interfacing did you dirty? PAD STITCHING! Want to create shape and structure without bulk? PAD STITCHING!
During our workshop we’ll be working on a demo for you to reference at home. So, I invite all students to begin thinking of projects, and bring in fashion fabric from an upcoming project so you can see the interaction the other fabrics and pad stitching have on your fashion fabric.
This class is marked as intermediate; however, beginners are welcome!
Instructor: Frances “Frankie” Lopez
Instructor provides:
- handout
Student provides:
- ½ yard flannel
- ½ yard horsehair canvas/ hymo
- ½ yard of fashion fabric entirely of their choice
- 1 yard of cotton/linen twill tape
- 1 spool of thread in a contrasting and easily visible color, preferably silk but cotton will do!
- Sewing needles/sharps
- Scissors
- French curved ruler*
- Tailors chalk/pen/etc.*
- Thimble*
*recommended, but not required
Session 2: 12:00 pm – 1:30 pm
See above description.
New tools and fabrication technologies are increasingly available and affordable to hobbyists and costumer. 3D printers, laser cutters, cutting machines like Cricut and Silhouette, dye sublimation printing and embroidery can all help you make your dream cosplay. This lecture and demonstration is an introduction to tools, materials, and how to get started with new fabrication methods.
Instructor: Sahrye Cohen and Hal Rodriguez
This is a lavishly illustrated history slide-talk that will focus on assiut cloth from Egypt. Assiut, known by other names including tulle-bi-telli and al-tally, is a single stitch metal embroidery technique. It was favored by the Ottoman during the middle of the 19th century and quickly spread throughout their empire. During this talk, I’ll present the history, technology, and use. Project ideas for the sample piece will be also shown at the end of the lecture.
Instructor: Dawn Devine
Instructor provides:
- sample of the cloth (optional) – $8
There are so many wonderful books with amazing gridded patterns in them. But how do you use them? Using a simple Regency chemisette, you will learn how to size up a gridded pattern to the actual size, and then how to adjust it to fit you. Sewing instructions to make the actual garment will be provided but not covered in class.
Instructor: Catherine Scholar
Instructor provides:
- Handouts and downloadable pattern
Student provides:
- One inch grid pattern paper, one yard.
- Brown craft paper, at least two pieces 24×24 inches. Cut up paper bags etc work fine.
- Pencil and eraser
- Clear ruler
- Clear scotch tape
- Paper scissors
- Measuring tape
Session 3: 2:00 pm – 3:30 pm
EVA foam is a basic building block of cosplay and making costume armor. This lecture and demo is an introduction to the materials, tools, methods and techniques used to make costume projects out of foam.
Instructor: Sahrye Cohen and Hal Rodriguez
This class will explore the history of smocking, with a slideshow of examples from historical and popular costuming. The instructor will discuss the range of different smocking styles, and demonstrate the basic techniques for each. Students will leave the class armed with all the knowledge and inspiration they need to incorporate smocking into their own costume designs.
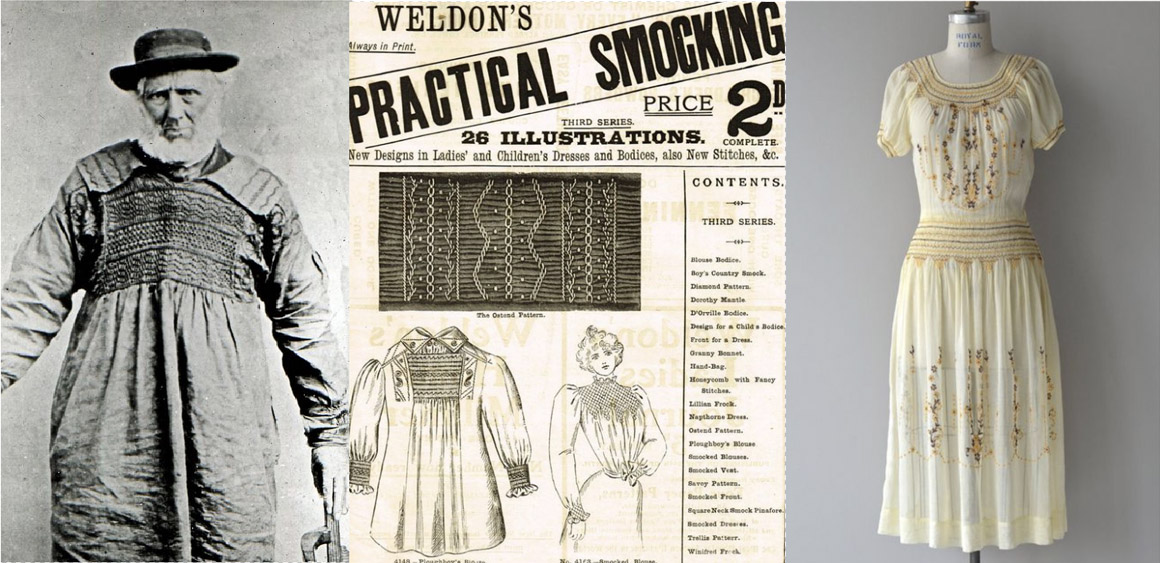
Instructor: Natalie Wiener
Instructor provides:
- Class notes
Student provides (optional):
- ½ yard or so lightweight cotton or linen
- sewing thread
- embroidery floss
- fabric pen
- ruler (clear plastic drafting is great)
- basic handsewing kit (needles, scissors, thimble)
Here we will cover the utility of wool fabric for garment construction. The class will investigate types of wool fabric in use during the 19th century, the advantages and disadvantages of this fiber, and some practical notes on sewing with it. There will be several demonstration objects to help the student see what they can expect from their first sewing project in wool, including pressing and edge finishes.
Instructor: Melissa Kelly
Instructor provides:
- a collection of eight example wool and wool blend fabric swatches, each 5 by 6 inches, to get an idea of how they feel, drape, pleat, and behave during other sewing manipulations – $4.
Students will learn how to make a basic Dorset cartwheel button with thread on a ring, and variations of the button if time permits (basketweave and flower designs).
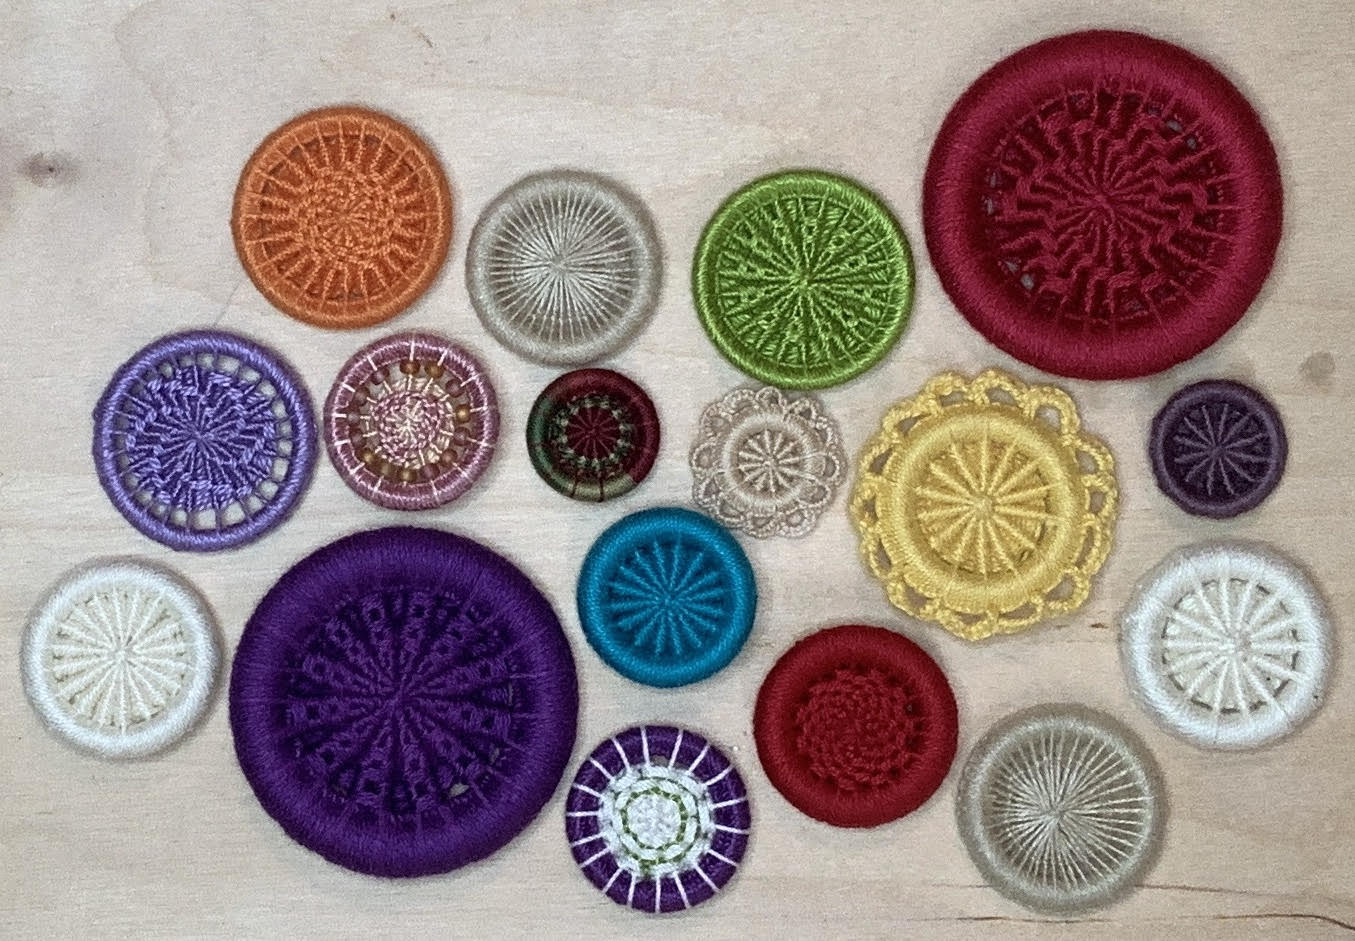
Instructor: Patty Coe
Instructor provides:
- PDF file
- Kit (optional): 2 needles, rings, thread, clamp, and toothpicks – $25 + $7.95 (shipping)
Student provides:
- a tapestry needle (size 22 is good)
- size 10 crochet thread
- rings (plastic or metal, about 1” diameter)
- quilting clamp or clothespin is helpful to hold your work in progress
- toothpick can be helpful for thread-wrangling
- pair of scissors
- pliers are helpful to pull the needle through