Turning Circles: how to draft a circle skirt pattern to your measurements

by Cybele A. Baker. Published in the September/October 2016 issue of Finery.
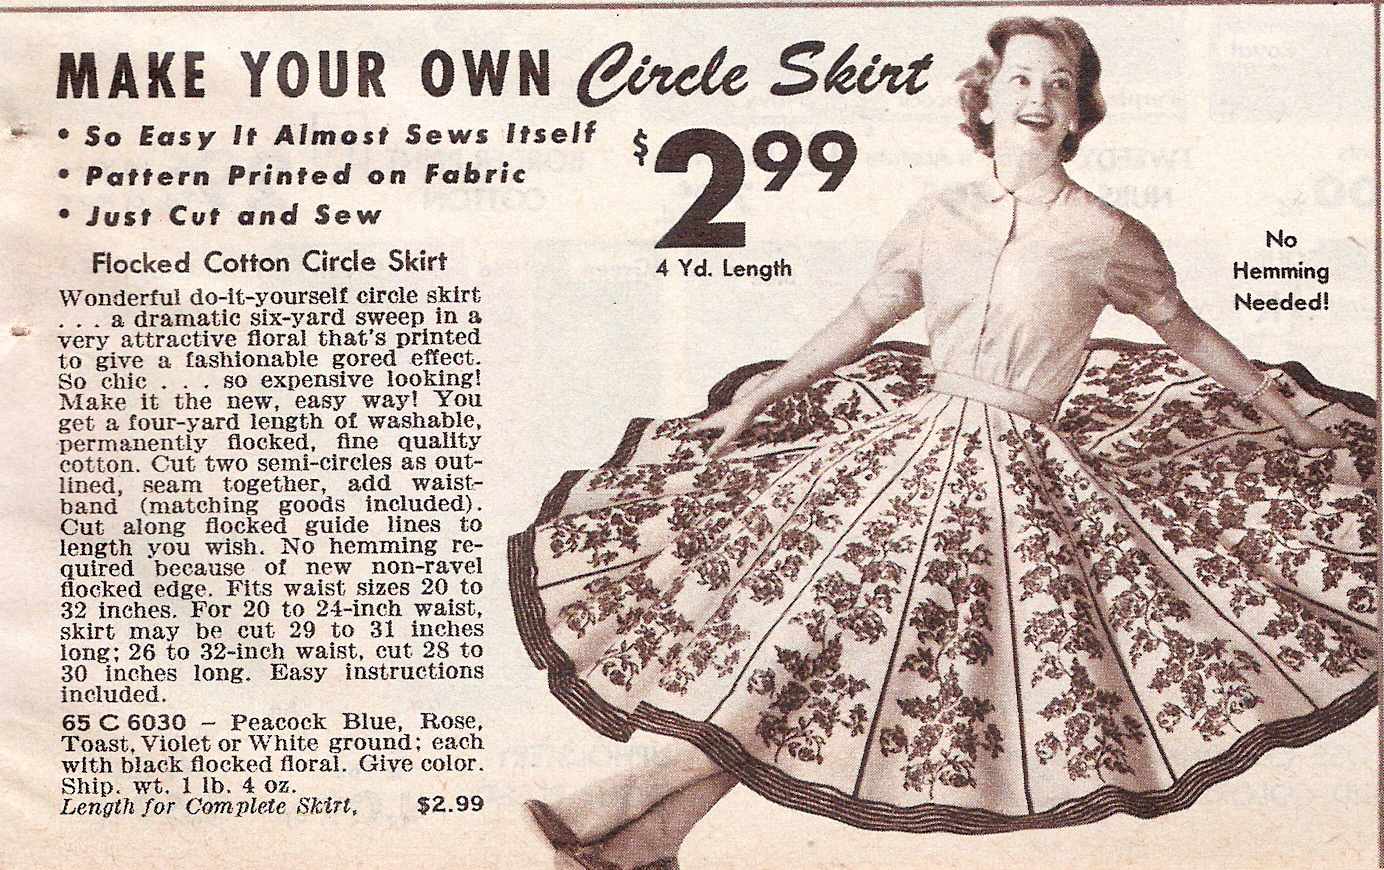
The circle skirt has very little fabric at the waist and flares out to a full circle at the hemline. It can be any length you want but varies from person to person as it is reliant on your specific measurements. This is why you don’t see many circle skirt patterns for sale but the usual multi-piece pattern with gathers or pleats at the waistband. A circle skirt is a very flattering skirt because less fabric at your waist makes your waist seem slimmer. These instructions are intended for intermediate to more advanced sewers. A beginner may have some trouble understanding several of the elements to create this skirt.
Supplies:
- 4-5 yards of your dress fabric
- 2-3 packages of extra-wide “double fold” bias tape, as close to matching as possible.
- Matching thread
- Skirt hooks (4) or buttons (2)
Choosing Fabric:
To complete the skirt, you will need 4-5 yards for the circle skirt, placket, and waistband. Avoid fabric that is 45” wide and buy 55” width or more. (This is assuming you are doing a dance length or floor length skirt; shorter skirts won’t require as much fabric.)
Measuring to Mark the Fabric:
1. Measure your waist. Waist: ____________
2. Measure the distance from your waist to either 3’ above your ankle or to the floor (wear the shoes you plan to wear with this as it will affect the skirt’s length.) PLUS 1-2 inches for the hem.
Length: ______ + _1or 2__ = ______
3. Take your waist measurement and add two inches then divide that number by 6.28. Write this number down in the formula below. For example my waist is currently 34 inches. So 34 inches plus 2 inches = 36 inches so then I divide that by 6.28 I get 5.73” just round up to 5.75 inches.
Final length from #2 above: ______ ÷ 6.28 = ______
Marking, Cutting, and Sewing the Fabric Pieces:
* Remember that, in this description, I am using my waist measurement; your numbers will be the ones you obtained above in “Preparing to Cut the Fabric.)
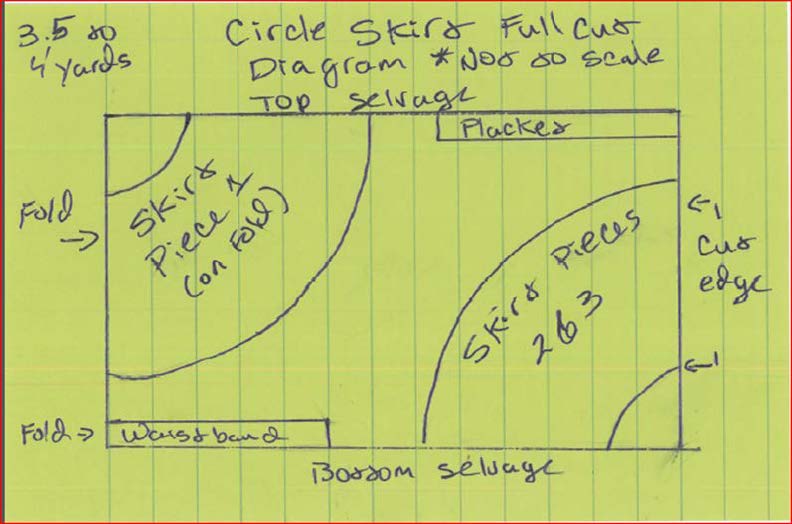
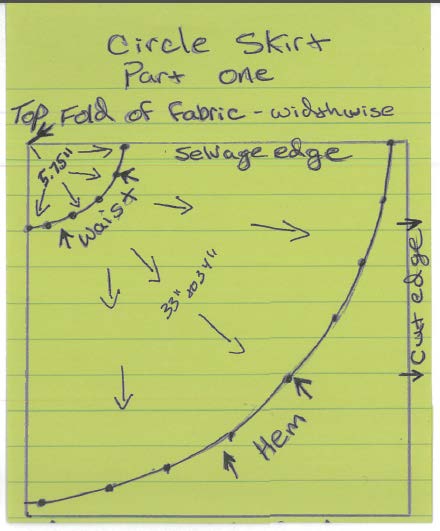
1. Take your fabric and fold it in half width wise with the selvage edges at the top and bottom as shown in the “Circle Skirt; Skirt piece marking detail” diagram.
Note: The “Circle Skirt Full Cut Diagram” on the next page shows the complete fabric layout for marking and cutting your skirt.
2. After folding, grab your measuring tape to mark the waistline. Starting at the folded corner, measure down the number of inches that you got from your waist measurement calculations (for my waist it would be 5.75”). Then, holding one end of tape at the corner and a washable fabric pen or pencil at the other, rotate the pen at the end of the measuring tape around the corner until you have the entire top corner marked.
3. To make the hem marking, use the measurement you took from waist to above the ankle or floor (+1-2”) and measure from the waist marking in the top corner. For example, if your waist to ankle measurement was 32” you would measure down 33-34” from the waistline marking, rotating the same as you did for the waist marking. This is your hem.
4. Cut along the hem line but leave the waist markings uncut for now. Repeat using the bottom selvage edge in the opposite corner just as you did the first.
You will have one half-circle piece (the front-center piece of the skirt) and two quarter-circles. You will French seam (or flat fell) each piece together, leaving one seam open for now. NOTE: Your skirt closure can be in the back or side. Just remember, that is the seam you leave unsewn.
The remainder of your fabric is for the waistband and the placket. See illustration below for example of how to place/cut the rest of your pieces. (More information about the placket is included in a later section.)
5. Waistband:
Cut a 7” wide/tall rectangle against the folded edge. For length, take your waist measurement and add 6-8” to make room for the placket and seam allowance then divide in half. If you have to cut two pieces for your waist band add ½’ for the seam allowance to sew them together.
Waist: _____ + 6”-8” /2 = _____.
This results in a 3” tall waistband with ½” seam allowance. If you want it shorter or taller, adjust the width/height accordingly.
6. Placket:
Cut ANOTHER 7” wide rectangle. The total length can be variable but about 13-17” should be sufficient for the placket. You can cut it in two equal pieces if you do not have enough fabric length for one long piece. (The “Circle Skirt Full Cut Diagram” shows this as two pieces but if you have enough length, cut it from one layer of your fabric.)
6. Bias Tape:
Your bias tape comes prefolded in half with a ½” fold on each side. You need to iron the tape open along the center fold and one of the ½” folds but you can leave the other prepressed fold alone. You can chose to sew your packages of tape together into one long strip or sew them individually leaving a seam allowance on each end to attach as you go along.
With the right sides of the tape and skirt fabrics facing each other, pin the edge of the tape that you ironed open along the bottom edge of your skirt. Stitch the bias tape to your hem.
Turn the skirt inside out, fold the bias tape over towards the inside of your skirt, and iron. Pin the top, folded edge of the bias tape to your skirt. Then stitch the top of the folded edge to the skirt. You now have a slightly weighted bottom hem on which you can add whatever hem decorations you like or leave it plain. For more advanced sewers, if you want to leave it plain but do not want a machine stitch showing on the right side of your skirt, you can hand stitch the top of the bias tape to your skirt doing a blind stitch.
7. Placket and skirt waist closure:
The placket is a bit of fabric to prevent your petticoats from showing at your skirt’s waist closure. It folds onto itself adding about 3” of your skirt fabric behind the closure so that if your skirt closure opens a little while moving, all you see is more of your skirt fabric. You can also add small snaps to close it further if you desire. (The tiny plastic ones would suffice and be pretty invisible.
8. Closing your last skirt side seam:
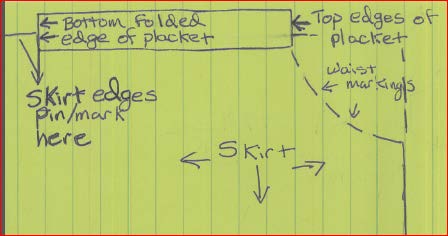
NOTE: If you had to cut a two piece placket sew it, right sides facing, along one of the bottom edges first then continue with this step. Using your placket piece take your open skirt edges and measure and mark where the center of the placket will be by placing the skirt edges, wrong sides together folding the placket in half and pining to the top waist markings of the skirt. Then mark where the center of the placket hits the seam going down the skirt, and pin the skirt piece together there. (See the above diagram)
Just below where you did your marking for the middle of the placket clip the skirt edges in about ½” then pin the skirt pieces together from the clipped edge down to the hem. This is where you will French seam the skirt together, as you did the other skirt pieces from the hem stopping at the clipped edge, leaving the upper portion open for your placket.
Finishing the placket and attaching it to the skirt: along one side of the long edge of your placket press a ½” fold. Placing right sides together take the unpressed fold edge of your placket and pin it from your waist markings all the way to the other waist marking. Stitch all the way across from skirt piece to the other. Fold and press your placket over so the ½’ pressed seam matches where you stitched the unpressed edge to your skirt. Stich that pressed edge to your skirt.
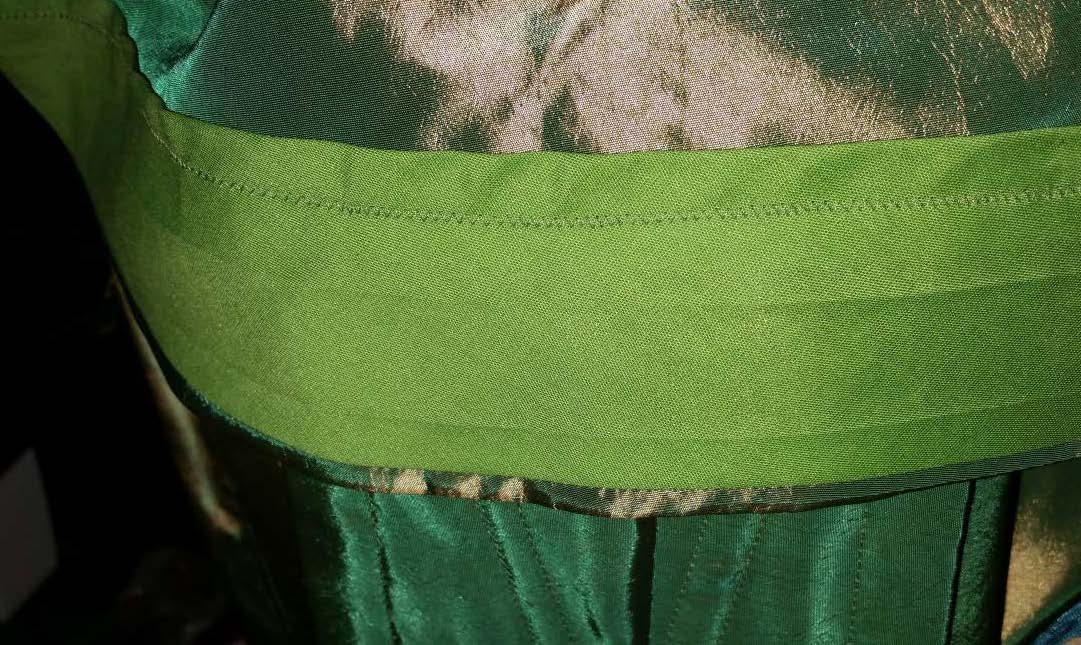
9. Waistband:
Iron a ½” seam along one of the long edges of your waistband. Leave the other edge unpressed.

Cut your waist markings and pin the unpressed long edge of waistband to your skirt and placket, wrong sides facing each other. NOTE: one end of the placket is pinned into the waistband and folded over the skirt fabric, creating three layers of fabric; one skirt layer and the double layer of the placket. The other side of the placket is open away from the fabric of the skirt and pinned into the waistband. The purpose is so that when the three layer end of the waistband goes over the other end, the placket pieces match up inside the skirt creating that fabric buffer if your skirt should open. (There may be some small pleats needed in the skirt to fit it into the waistband just do small folds over as you go to make it fit.)
Sew a ½” seam then press that seam and the center of the waistband over to the right side of the fabric. Turn your skirt right-side out, pin the second edge over, and pin the ironed edged along the previous seam, making it as even as possible. After you attach the waistband, add skirt hooks or buttons to close your skirt. You can do two rows of hooks, 2 on the top of the waist band and two below it in case your need to adjust the skirt closure for different widths. The same with buttons, do two so you can make your waistband a little looser when needed. For example you are using a thicker petticoat etc. Bonne Chance!

Leave a comment