DIY Gentleman’s Cane

by Denise Tanaka. Published in the September/October 2015 issue of Finery.
Recently I went shopping for a Victorian gentleman’s walking cane. The cheap plastic ones at the Halloween costume warehouses are… well, cheap looking. The very nice ones sold online are $50 and up— beyond my budget for outfitting a relative who may never wear the costume again. So I channeled my inner MacGyver and decided to make one myself.
STEP 1.
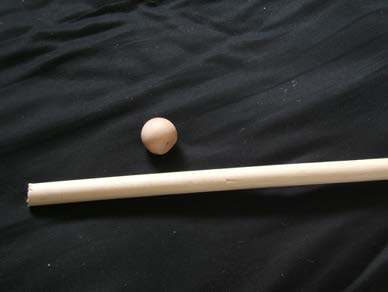
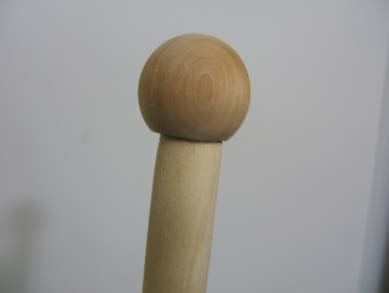
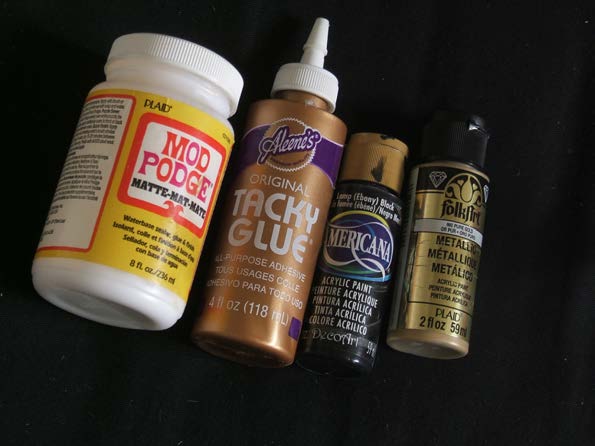
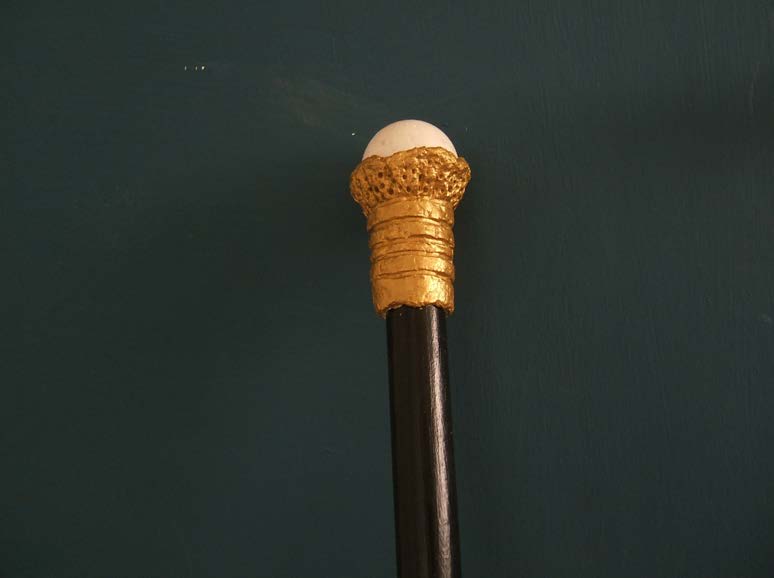
I started with a wooden dowel (one-inch diameter and 3 feet long) and a knob-type bead. You could experiment with different knob materials as long as they are solid and can be glued. I used Tacky Glue, but if you’re pressed for time you could also use a hot glue gun.
STEP 2.
I used acrylic craft paint to make the knob white (like ivory) and the dowel black. After the paint dried, I used Modpodge to varnish and waterproof it. Another idea would be to cover the knob with a piece of heavy-duty aluminum foil and smooth it flat, but I haven’t tried that yet.
STEP 3.
For the fancy part, I did some trial-and-error with polymer clay. My oven isn’t large enough for the 3-foot dowel so I experimented with baking a napkin-ring sort of object and sliding it on afterwards. It did not fit quite right to the base of the knob. I resorted to Sculptamold and I’m very pleased with how it turned out.
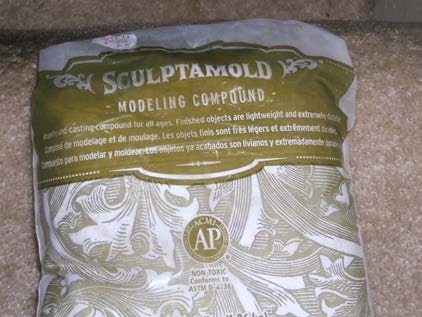
Sculptamold is a powder found near the papier-mâché and home craft clays. By adding more or less water, you can make a paste with the consistency of bread dough. Sculptamold dries to a very durable hardness in about 24 hours and is not brittle at all.
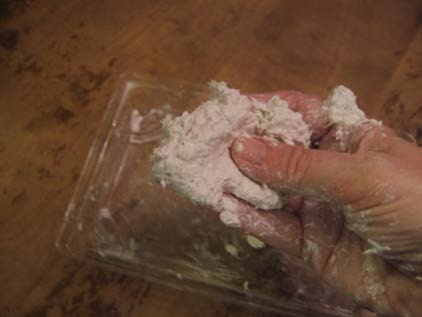
For this project, I only used 1/2 cup out of my bag of Sculptamold powder. It can be a little sticky at first. I wait until it gets halfway dry to smooth the surface even more with a damp tool. This is also the time to make the gouges and textures to imitate die-cast metal filigree. I used a fork to press parallel lines.
STEP 4.
I finished with metallic acrylic paint. One coat covered it very well, but you could use 2 coats. I finished it with a topcoat of Modpodge to seal it.
TIME: 4 to 5 days of just waiting for paint or goop to dry in between steps.
MATERIALS COST: Under $ 10

Leave a comment