Creating a Costume for a Fictional Character

How an author envisions her creation
by Denise Robarge-Tanaka, First published in the November/December 2014 issue of Finery
I write fantasy novels set in a faraway world of my own creation. My latest magical adventure, A Blighted Touch, is scheduled for release next spring. It’s about a mysterious chime that rings out a curse across the land. In one city, everyone feels pain at the slightest touch. In another valley, everyone is blind. Only a cloistered young woman and a ne’er-do-well storyteller are immune, and they embark on a perilous journey to discover a cure.
As part of my book’s promotion, I decided to create an original costume based on one of my characters. To be honest, my concern is personal. When envisioning your book going to the big or the small screen (One can dream!) is the appropriation of your vision by producers, directors, and costume designers. I plan to wear this outfit to future book signings and author appearances. Also, as a life-long costumer, wardrobe is a key element of creating my fantasy world. I want to describe realistically the sensation of living and moving in pseudo-historical garments.
Who Should I Be?
For this project, my first decision was to choose one of my characters. The heroine of my novel is a winsome twenty-something; several other characters are men. Although a book’s description of its characters shouldn’t limit your creative possibilities, I (realistically) selected a character who is the closest physical match to myself.
I chose Tesia, the sassy landlady of the roadside inn where my heroes on their journey take a room for the night. She is sensible, frugal, and self-sufficient. Like others in the valley, she is blind, yet she can smell if a guest has burned a candle too many and will charge him extra. The costume should be functional, like something an innkeeper would wear.
The setting of my fantasy world has medieval-style technology; therefore, my choice of fabric and colors was limited: no satins or polyester. Although there is plenty of magic in my world, the basic necessities of life are still mundane. My innkeeper lives in Heron Valley, so I wanted a blue and white color scheme. She is a merchant whose social status is above the vagabonds who patronize her establishment, so I determined that her gown would be one that a skilled seamstress of that period could construct. For accessories, Tesia carries a brass key ring, a coin purse, and wears a high quality leather belt. To complete the outfit is my RenFaire dagger, its place on my belt says that my character doesn’t depend on a husband to defend herself against rascals who don’t pay their bills.
Budgeting and Design
After deciding who I would portray, I established a budget for time and expenses. As I work full-time, construction would need to be done on weekends, evenings, or lunch hours at the office. My design skills are not advanced enough to make an original pattern from scratch without a waste of time in trial-and-error, therefore I chose a commercial pattern that I’ve used before, Simplicity #4940.
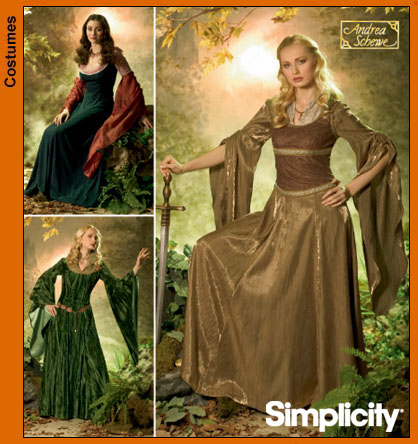
It is the basic outline of your typical medieval bliaut gown. Because I’m not doing an historical reproduction, I jettisoned the long droopy sleeves and substituted a detachable sleeve at the elbow, using a tie technique that I learned in making RenFaire costumes. But my primary concern was the choice of fabric.
I realized that the outer fabric is crucial for any costume. I plan to wear this for many future events such as book signings, conventions, etc. I wanted a homespun look, not the machine-weave broadcloth you find at the usual chain fabric stores. Stone Mountain & Daughter is an invaluable resource for quality fabrics; but as I work full-time and live in the South Bay Area, I didn’t’ have the time to drive up to Berkeley. Through email inquiries, Mary Jane Nee, Operations Manager at SM&D, suggested a linen-rayon blend with an uneven dye saturation and nibs in the weave, and kindly mail swatches to me.
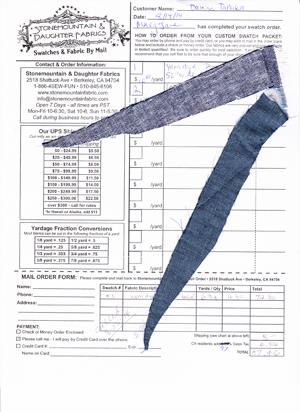
She was right and I loved the feel of its lightweight and pliability. From a phone call and a credit card number, a big box arrived on my doorstep a few days later. What I like about this linen/rayon blend is that it handled like a dream. It’s not slippery, irons to a crisp line, and it doesn’t fray much. One drawback that I didn’t expect was the “wiggle” on the bias. The technical term is diagonal stability, although the fabric isn’t exactly stretchy. It handled very well once I got the feel of it.
Preventing Problems
I made a muslin to determine correct pattern size and to determine necessary alterations. It was worth spending the extra weekend to do this step. Even if you measure carefully, there really is no better way to see how a pattern’s design fits a human body and where adjustments are needed. I do not have a standard hourglass figure, so I can never rely on the guidelines of commercial patterns. How the shoulders are spaced, how the princess seams line up to my frame, and whether I would need a foundation garment—these are all decisions you can only make after checking yourself in the mirror with a muslin mock-up.
Then came cutting the fashion fabric. Like anyone who sews I’m always nervous about slicing into the “real thing.” Once a pattern is cut, there’s no going back. You can’t rely on buying additional yardage after-the-fact to replace mistakes as dye lots change and fabrics are sold with no replacements or reorder.
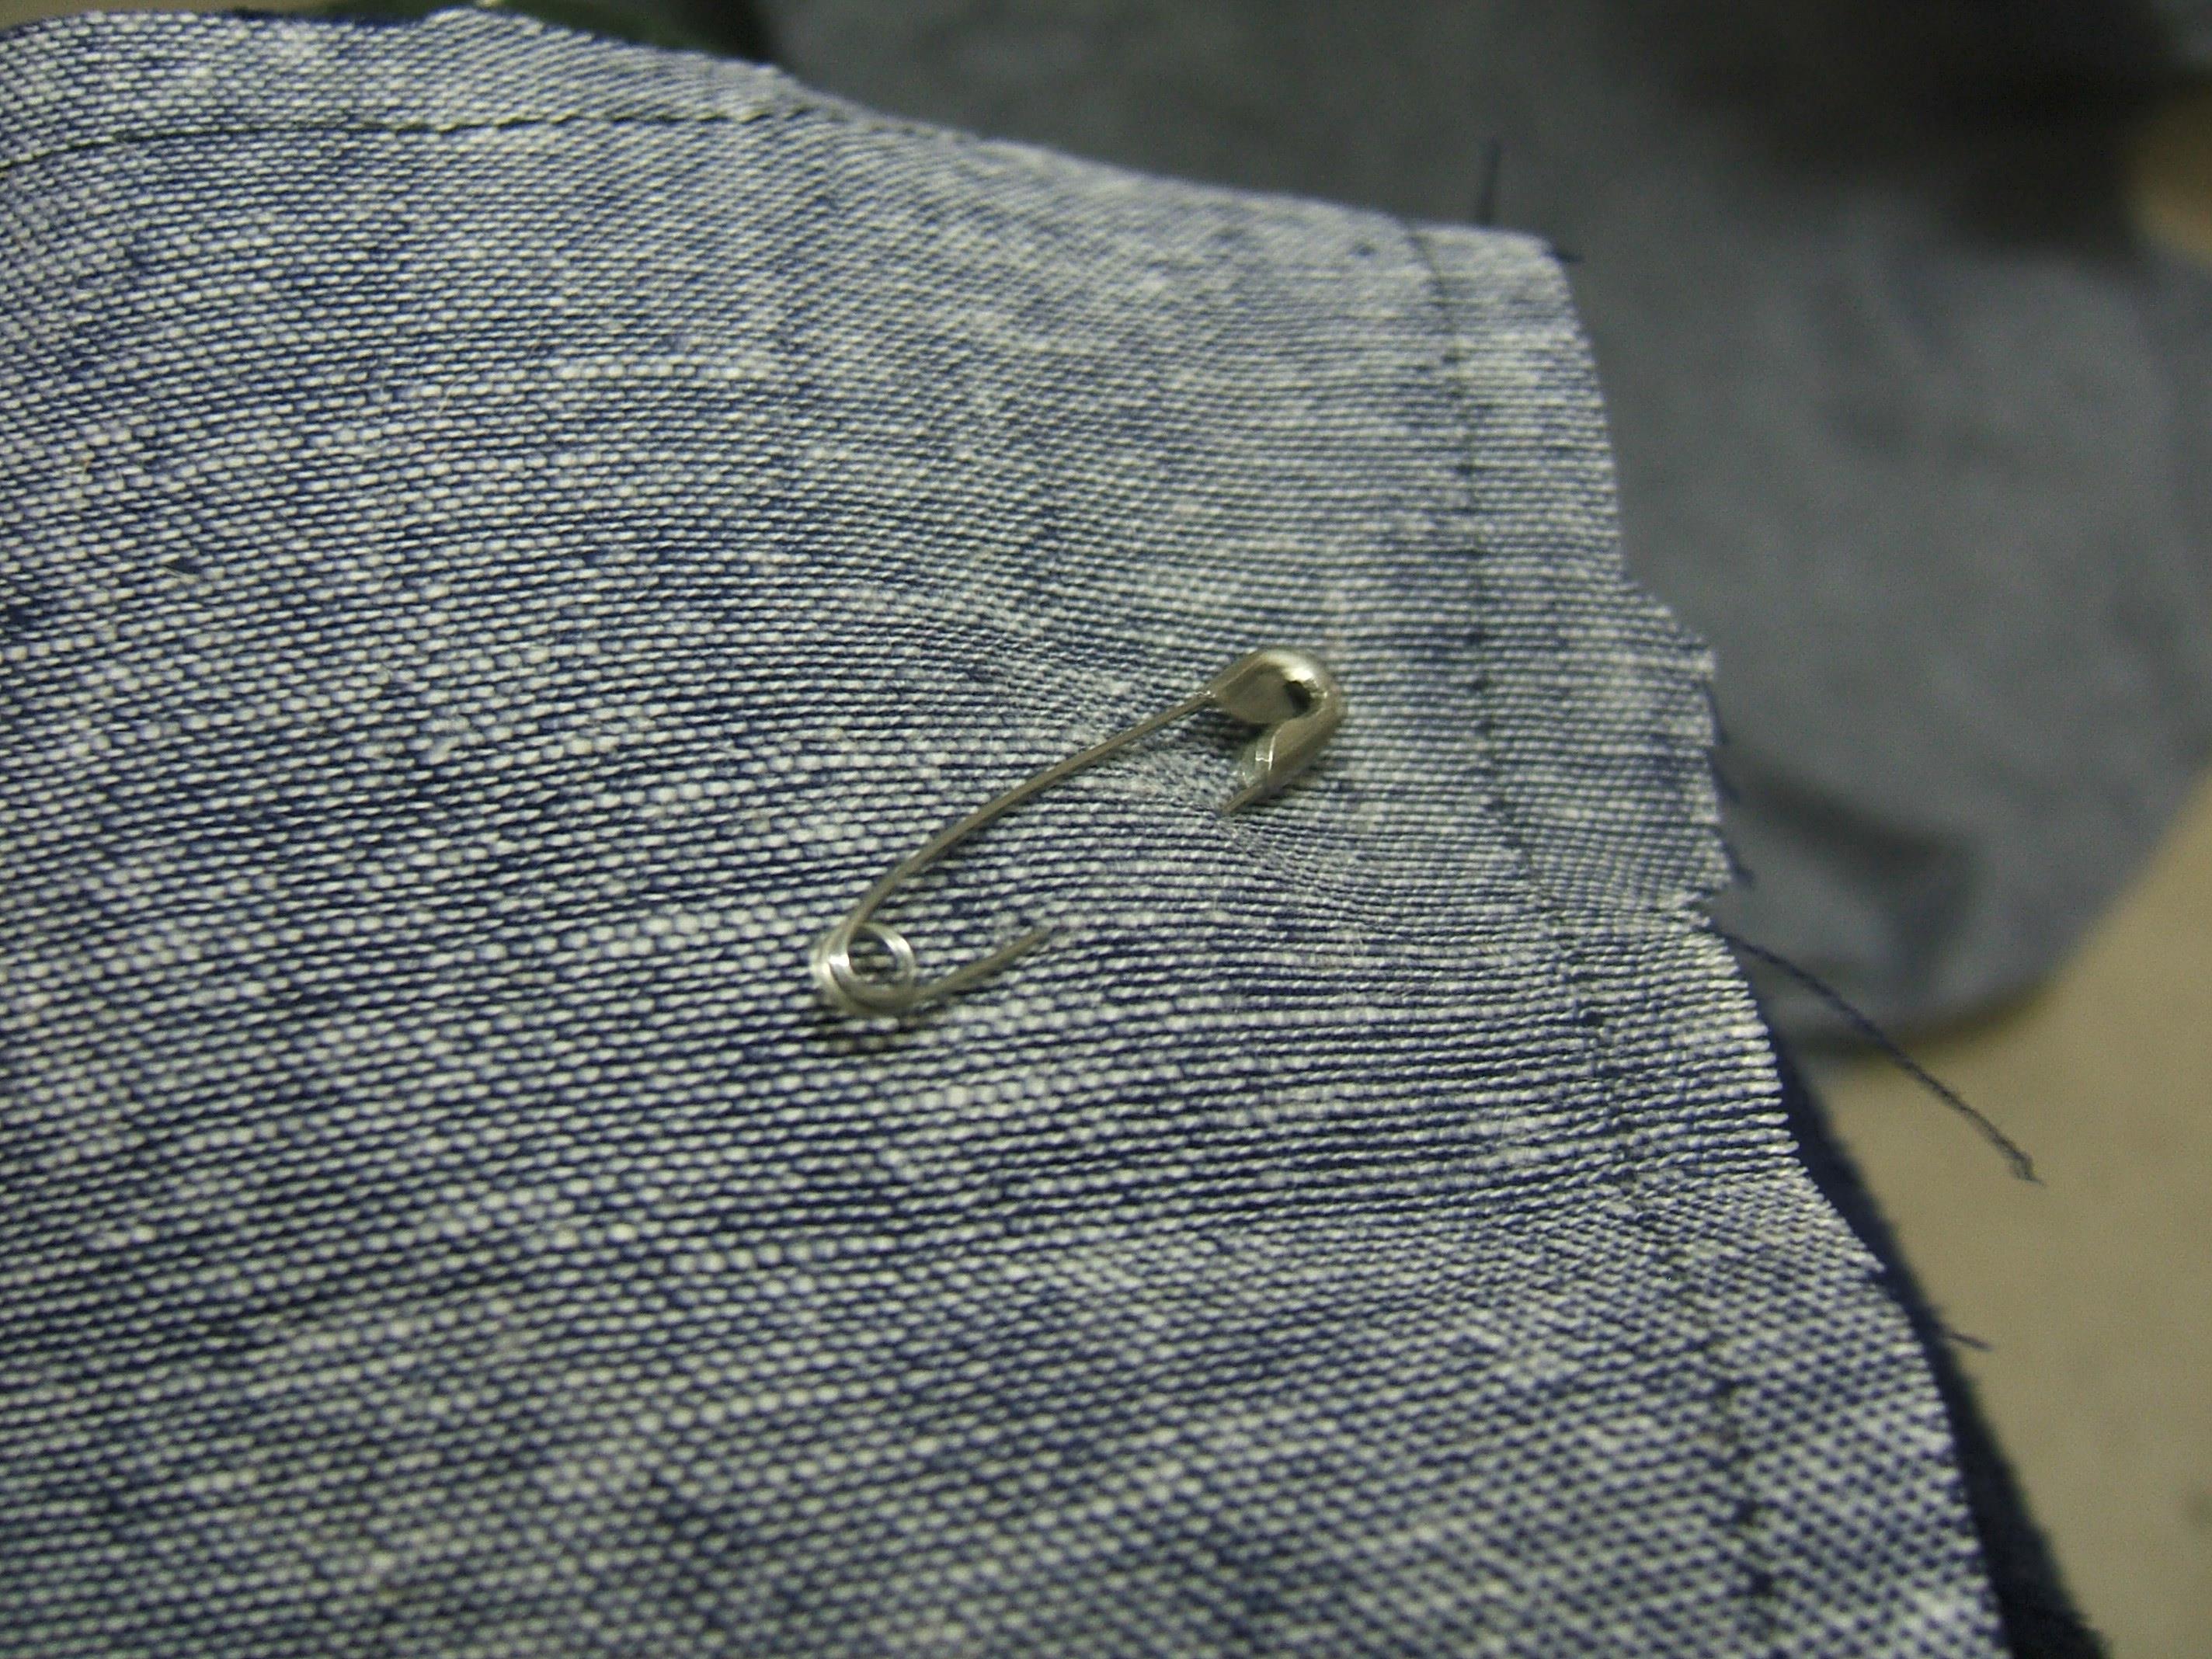
As for construction tips I use safety pins for marking the “right” and “wrong” side of the fabric, especially helpful when using a fabric that’s similar in color on either side. My gown has several vertical panels joined by princess seams, so reversing any of the pieces could have meant delay or disaster.
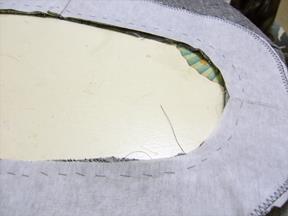
Finally, substituting grommets for the zipper required a facing flap. I used a stiff cotton from scraps in my collection. I was concerned about fabric pucker if the edge seam did not have a 1/4-inch steel bone slipped into it, but I didn’t want a stiff back seam in a loose flowing gown A little bit of ripple is acceptable and realistic. I stabilized the edge seam with a running stitch of heavy buttonhole thread that gives a hand-sewn look.
What Went Wrong and How I Fixed It
Attaching the sleeve extensions with a blanket stitch didn’t work as I had hoped. I planned to make detachable lower sleeves instead of the long angel sleeves of the original pattern so I used cotton floss to make a blanket-stitch on the upper sleeve cuff and the connecting edge of the extension. My plan was to put another line of floss through the blanket stitches to weave them together.
When I tried it, I didn’t like the results: it looked more like an attachment to Frankenstein’s monster, a revelation that doesn’t appear until you assemble your creation. I hand-sewed the sleeve extensions into the underarm seam. In the future, when not under a time crunch, I may cut all new sleeves from my remnants.
Also, I could not tell from the swatch samples how greatly this fabric wiggled across the bias, which I discovered while pinning the facing piece around the neck. Despite stay-stitching along the neckline, there was a lot of diagonal ease. After a lot of fussing and pulling of threads the facing lay correctly. I hand-basted this to assure correct alignment before machine stitching the neckline. Word of advice: Never disregard pattern directions to stay stitch!
I plan to model the outfit at the January 2015 Open House and look forward to seeing you there!
Five Things to Keep in Mind
1.Time. If you are planning to wear the costume at a particular event you’ll need to determine the complexity of the design. Honestly rate your skill level to avoid stressful last-minute sewing marathons. If you’re under a time crunch, don’t try to learn new skills on the fly such as embroidery, crochet, pleated ruffles, invisible zipper placement, etc.
2. Budget. The biggest expense will be the fabric. A lot of historical and fantasy gowns involve large amounts of yardage. Look for sales, coupons, online bargains, thrift store racks, as well as scraps from your stash for facing or lining.
3. Comfort. When designing the outfit, remember you are not a mannequin. How easy will it be to get dressed? Will you need help, or can you get into it by yourself? Think of the layers, if you’ll be over-heating in summer weather or in a crowded convention center. Can you move about easily, sit in a chair, drive a car, or go to the restroom? Will you have a train that will be stepped upon by others?
4. Materials. Think of your character’s social status and personality to inform your choices of color, texture and style. Consider the garment’s design and the physical properties of your material. If you’re not trying to be 100% historically accurate, give yourself permission to mix patterns and techniques.
5. Accessories. Personal items make it more than just a costume. A belt, a drawstring purse, a knife, a key ring—these things tell about your character. Also, think of practicality—where are you going to put your “real” wallet and hotel/car keys?
Find Denise’s social media links on her website http://www.drobarge.co (that really is dot CO, not dot COM)

Leave a comment