Check-In: 9:30 am – 9:45 am
Session 1: 10:00 am – 11:30 am
Pleater boards are a way to make Knife pleats without measuring or using pins. If you have used them without success in the past this class might help you figure out the best materials and techniques for good quick pleating. You can use them with medium to thin fabrics or ribbon to make pleated trims or decorative elements such as cockades. There are two different types of pleaters ones with standard knife pleats and ones with a greater fold width on the underside of the pleats making it better for pleats that have to curve or curl around themselves.
In class we will make a pleater board that is already marked with the proper lines. The students can pick the width and type of pleats they want. There will be a list of options below. If you are taking the mid-19th C ribbon evening headdress you will want to choose the 1/4” ribbon pleat.

Instructor: Lynn McMasters
Class Type: Workshop
Class Level: All
Material fees: $10
Estimated expense for students excluding material fees: >$5
Instructor will Provide:
- teflon protector sheets for classroom
- ironing board
- instructions as a pdf download (before class)
- cardstock paper printed with folds
- backing heavy cardstock
- iron-on glue
Student provides:
- 1” wide Binder clips (x24)
- craft scissors
- 12” straight edge (ruler)
- something to practice pleating with (ribbon or fabric)
Instructor Bio: Lynn learned to sew at the age of eight but did not learn how to make hats until her late 20s. She blames historical reenactment for her passion for millinery. It was then that she saw a real need for hat patterns so that costume makers could make hats as well as clothing. The more research she does on any historical period, the more she wants to make the hats from that period… and so it goes. Her “…Out of a Portrait” hat pattern company now has over 60 patterns covering eight historical eras. But of course the making of hats leads to the decorating of hats and an attempt to master the transformation of the feathers, fabric and ribbon into beautiful millinery decorations. Once the techniques are figured out Lynn loves to pass them on via her website, Facebook page and in workshop classes. To view Lynn’s patterns check out http://outofaportrait.com.
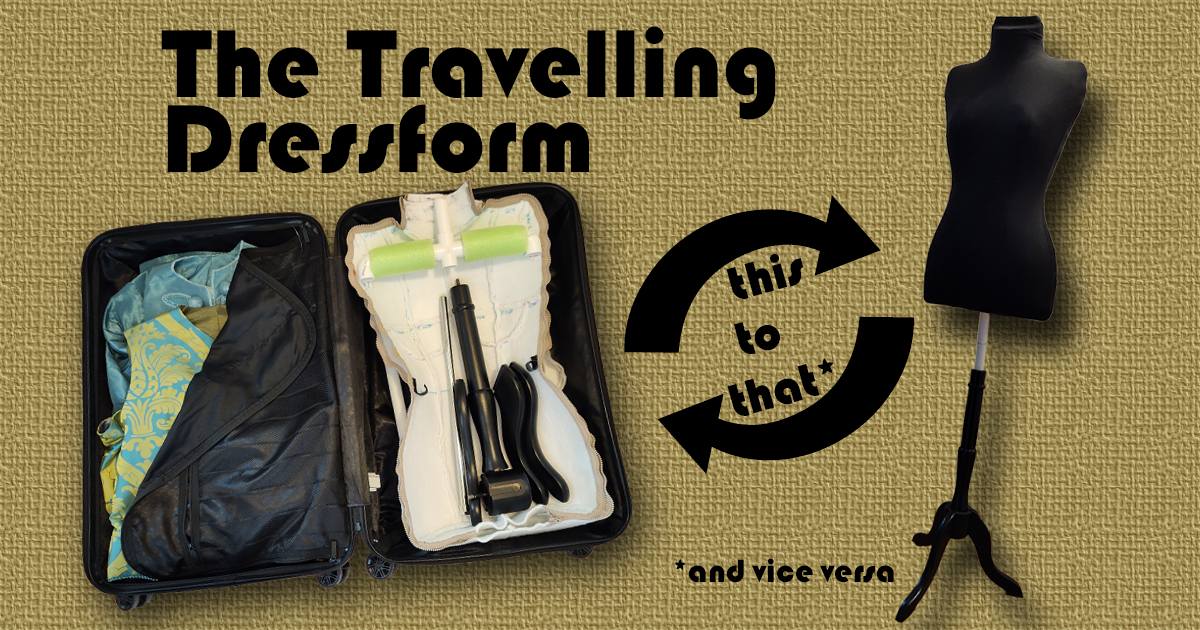
Are you tired of schlepping around bulky dress forms that don’t properly showcase your costumes? Discover how to create a full-size display dress form that can be easily disassembled and packed into a suitcase. Using Fosshape 600 and a custom pattern (provided by Bootstrap Fashion), along with other easily sourced materials, you’ll be able to stitch and steam your own travel-friendly dress form
Instructor: Kij Greenwood
Class Type: Lecture & Demo
Class Level: All
Material fees: N/A
Estimated expense for students excluding material fees: N/A
Instructor will Provide: N/A
Student provides: N/A
Instructor Bio: Since 1985, Kij Greenwood has worked professionally as a stitcher, cutter, draper, and designer for theater, ballet, and opera across the U.S. This included working with Tony, Emmy, and Oscar-nominated designers, a memorable season at Clown College, as well as designing inflatable advertising mascots for companies like Disney, Sony, and Nickelodeon using CAD software. She managed the Lacis Museum of Lace and Textiles and, now retired, Kij remains an active and award-winning costumer with the Greater Bay Area Costumers Guild and Clockwork Alchemy.
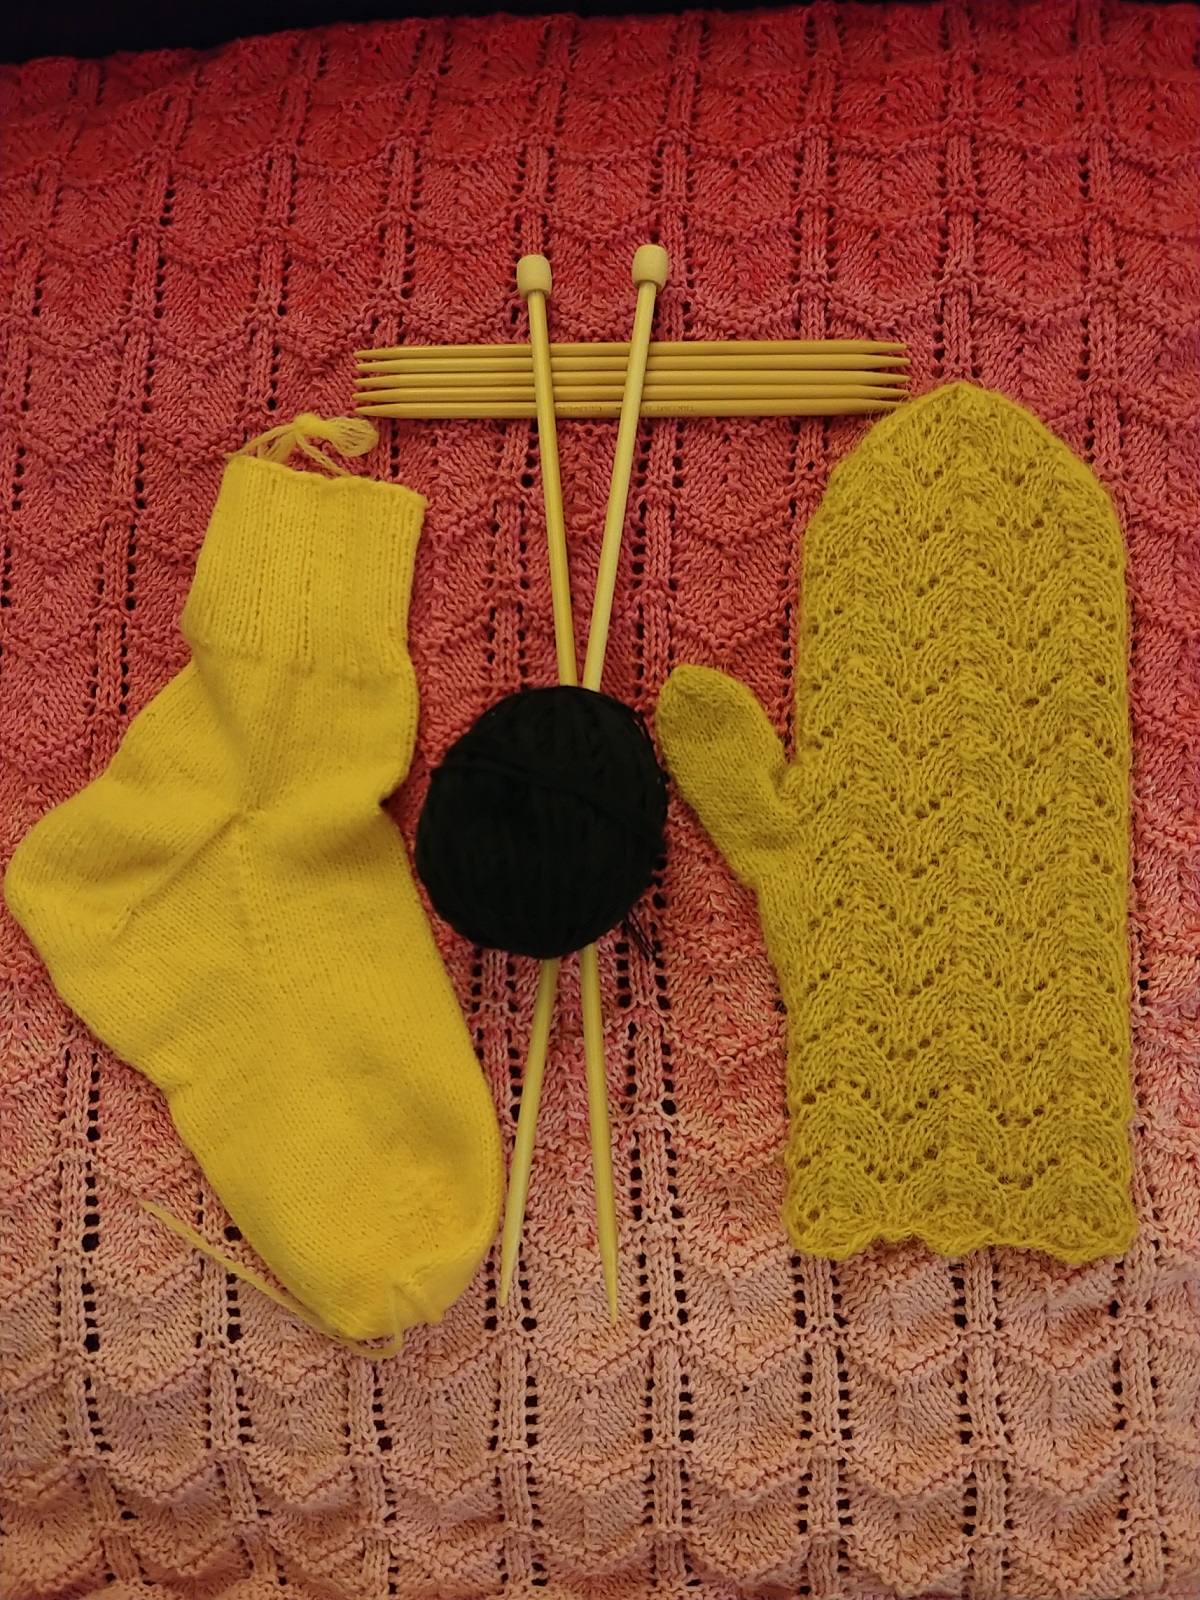
Knitting is a wonderful skill to have, both for making costume pieces and general knitwear for style and warmth. This class is open to all ranges of knitters and the instructor will work with you on the techniques suitable for your level. If you have never tried knitting before, this class will provide the opportunity to see whether the craft is enjoyable for you. Absolute beginners will learn the basic techniques of casting on, knit and purl stitches, and casting off. Knitters who have the basics can try out lacework, knitting in the round, stranded colorwork, or a combination of these. We’ll also discuss knitting language, how to follow patterns, and what to consider when planning a new project. Materials will be provided to practice techniques during the class, but must be returned. Feel free to bring your own needles & yarn if you have a project in mind.
Instructor: Melissa Kelly
Class Type: Demo/Workshop
Class Level: Beginner/Intermediate
Material fees: N/A
Estimated expense for students excluding material fees: N/A
Instructor will Provide:
- straight and double-pointed needles
- yarn suitable for practice during class
Student provides:
- needles and yarn if they want to take their work home and continue
Instructor Bio: Melissa has been doing fiber arts crafting since she was a child. Originally taught the basics of knitting by her grandmother, she has knit up pair after pair of mittens and socks, along with hats, shawls, and sweaters. Her favorite thing to knit are selbuvotter, a particular style of mitten from Norway, while her costuming interests specialize in Northern Europe from the 15th through 19th centuries.
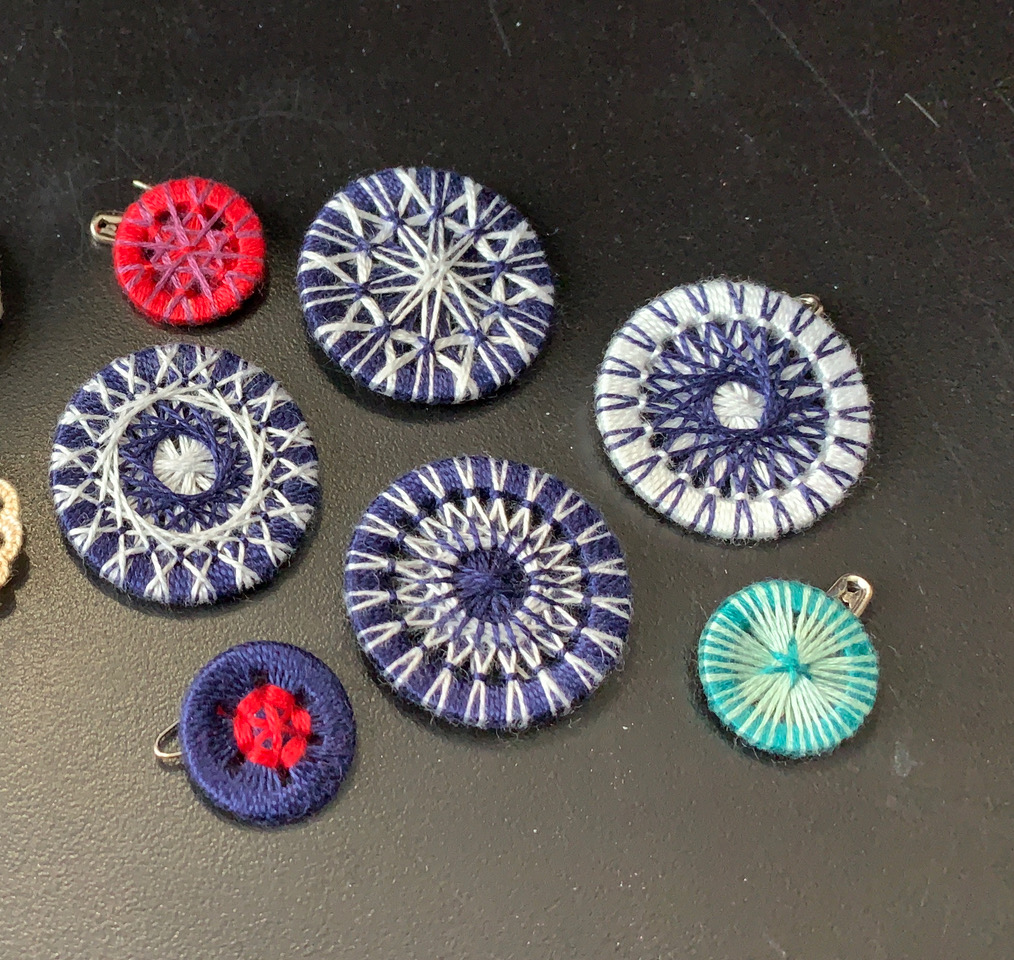
In this class we will make a traditional zwirnknopf button, also known as a shirtlace button, using two colors of size 8 perle cotton and an aluminum ring.
Instructor: Patricia Coe
Class Type: Workshop
Class Level: All
Material fees: $5
Estimated expense for students excluding material fees: N/A
Instructor will Provide:
- materials kits for students which include a needle
- 2 rings
- thread for two buttons (size 8 perle cotton)
- clip
- printed instructions.
- the instructor will have beeswax to share
Student provides:
- Small scissors or thread snips
- a narrow tip permanent marker or pencil
- beeswax (optional – the instructor will have some to share)
Instructor Bio: I’ve always loved clothes from different times and places, and the small bits and pieces that go into those outfits. Thread buttons are amazing little works of art on a garment, and also by themselves. I began making various types of thread buttons about 7 years ago: Dorset buttons, zwirnknopf buttons, MacClesfield & Leek/death’s head buttons, Yorkshire buttons, and others.
Session 2: 1:00 pm – 2:30 pm
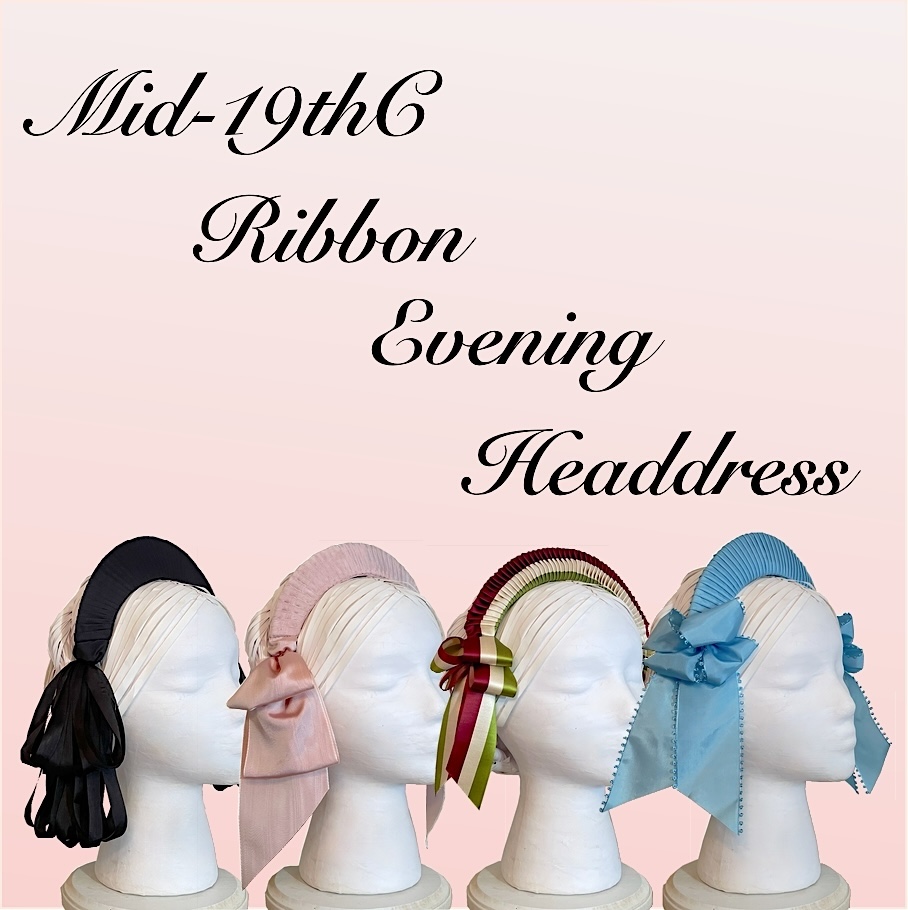
Students will make a pleated ribbon headdress. You need to have either made the proper pleater in the first session or have made one before (please email the instructor for approval) to sign up for this class.
Instructor: Lynn McMasters
Class Type: Workshop
Class Level: All
Material fees: $10
Estimated expense for students excluding material fees: $15
Instructor will Provide:
- teflon protector sheets for classroom
- ironing board
- instructions as a pdf download (before class)
- pre-made crown forms
- students need to let me know their head size if they have an extra small or extra large head size. As in 21” and under or 24 and over”.
Student provides:
- ~5yards of 2 inch wide ribbon but read the pattern instructions first before you buy your ribbon
- a basic sewing kit with the supplies you would need for hand sewing
- you need to have a 1/4” ribbon pleater board. Either made at home before the class or during period 1
- office tape
Instructor Bio: Lynn learned to sew at the age of eight but did not learn how to make hats until her late 20s. She blames historical reenactment for her passion for millinery. It was then that she saw a real need for hat patterns so that costume makers could make hats as well as clothing. The more research she does on any historical period, the more she wants to make the hats from that period… and so it goes. Her “…Out of a Portrait” hat pattern company now has over 60 patterns covering eight historical eras. But of course the making of hats leads to the decorating of hats and an attempt to master the transformation of the feathers, fabric and ribbon into beautiful millinery decorations. Once the techniques are figured out Lynn loves to pass them on via her website, Facebook page and in workshop classes. To view Lynn’s patterns check out http://outofaportrait.com.
Is anything more outrageously glamorous than feathers in your hair? Debutantes, showgirls, Queen Camilla… feathers always give your outfit a boost. We will learn to curl ostrich plumes and then make them into hair decorations, perfect for 18th and 19th century eveningwear, or any outfit you want!
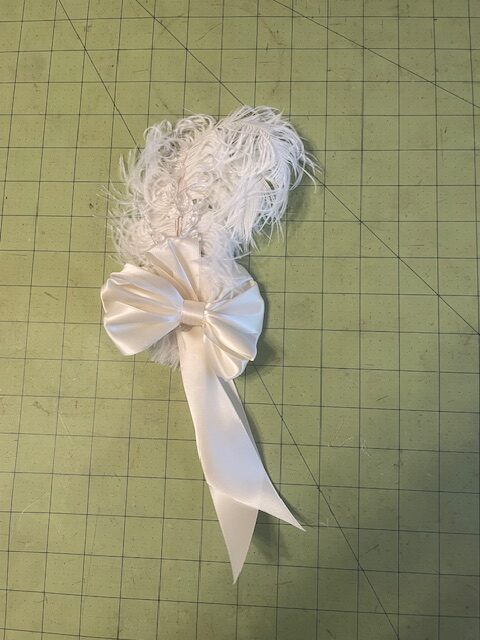
Instructor: Catherine Scholar
Class Type: Workshop
Class Level: All
Material fees: $10
Estimated expense for students excluding material fees: N/A
Instructor will Provide:
- ostrich plumes
- bead decorations
- hair clips
- millinery wire
- glue
Student provides:
- 1-2 yards ribbon, 1-2” wide, any color (to go with white feathers)
- hand sewing needles
- white thread
- thread snips
- beeswax
- thimble
- butter knife
Instructor Bio: Catherine Scholar read “Little House on the Prairie” at age five and has been obsessed with historic clothing ever since. She learned to sew at her mother’s knee and to embroider at her grandmother’s. In high school she discovered vintage dance, the Northern Renaissance Pleasure Faire, and Dickens Fair, and was amazed to learn that she could combine her passions for dance, costume, history and theater. Catherine served on the board of the Greater Bay Area Costumers Guild for 10 years as Newsletter Editor, Events Coordinator, and President. She has studied fashion design and enjoys working from period dressmaking guides. Catherine has taught many costuming workshops for GBACG, Lacis, Renaissance Fabrics, 1886/Costume On, Costume Skills Institute, and Costume College.
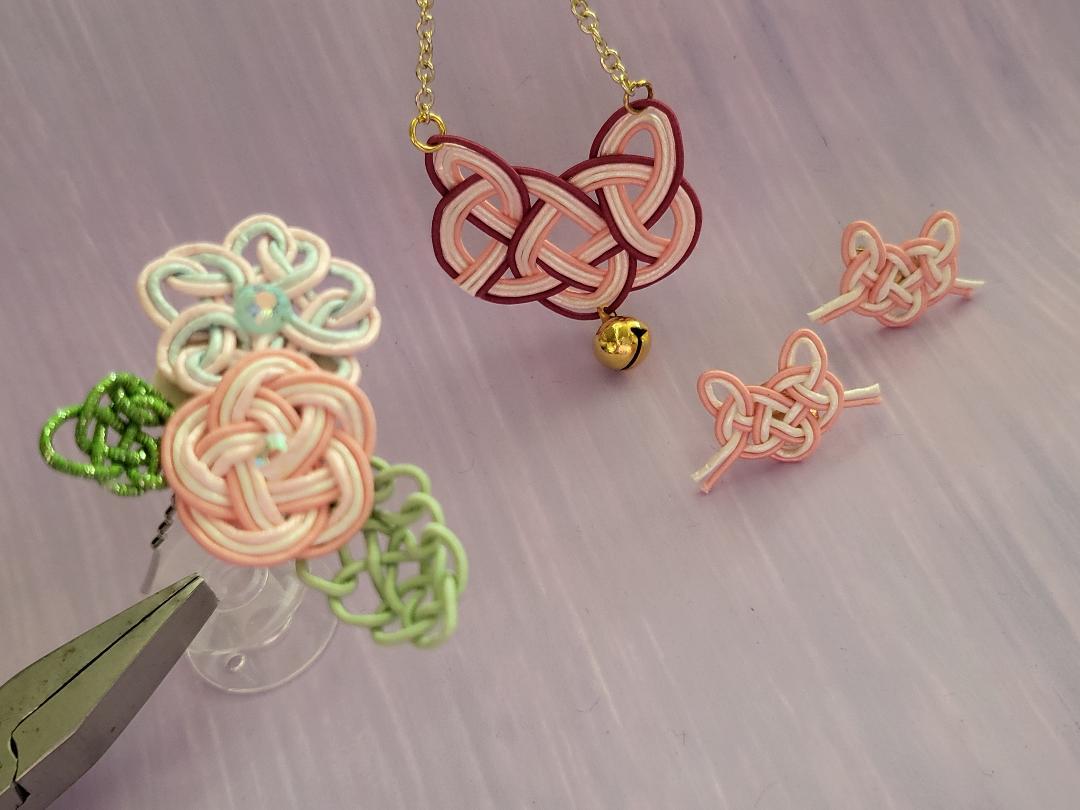
Composed of washi paper cords, mizuhiki (water pull) is a Japanese knotting art most commonly used to decorate envelopes (kinpū) for special occasions. In this shortened
taster hands-on experience, we will introduce this art form by trying one of the basic techniques to make a miniature mizuhiki ornament suitable for small accessories such as a brooch/hanging charm/pendant/hairpin.
Instructor: Bunny Ekaterin
Class Type: Workshop
Class Level: All
Material fees: $20
Estimated expense for students excluding material fees: N/A
Instructor will provide:
- mizuhiki cords
- glue dots
- wire
- toothpicks
- faux pearls/rhinestones/additional decorations
- hardware for hanging charm or pendant
Student provides:
- plastic placemat
- glue gun (mini preferred)
- glue sticks
- floral tape
- craft scissors
- straight tweezers
- jewelry pliers
- any jewelry hardware such as earrings backs or brooch
- backs or hairpins as preferred
Instructor Bio:
Bunny has been a costume enthusiast since her first disastrous role as the sheep in a school play. After years of thrifting, Bunny is interested in creative reuse and utilizing contemporary technology for historically inspired creations. Although equal-opportunity to all styles, periods, and cultures, their current passion lingers in the late-18th, late-19th, and mid-20th centuries.
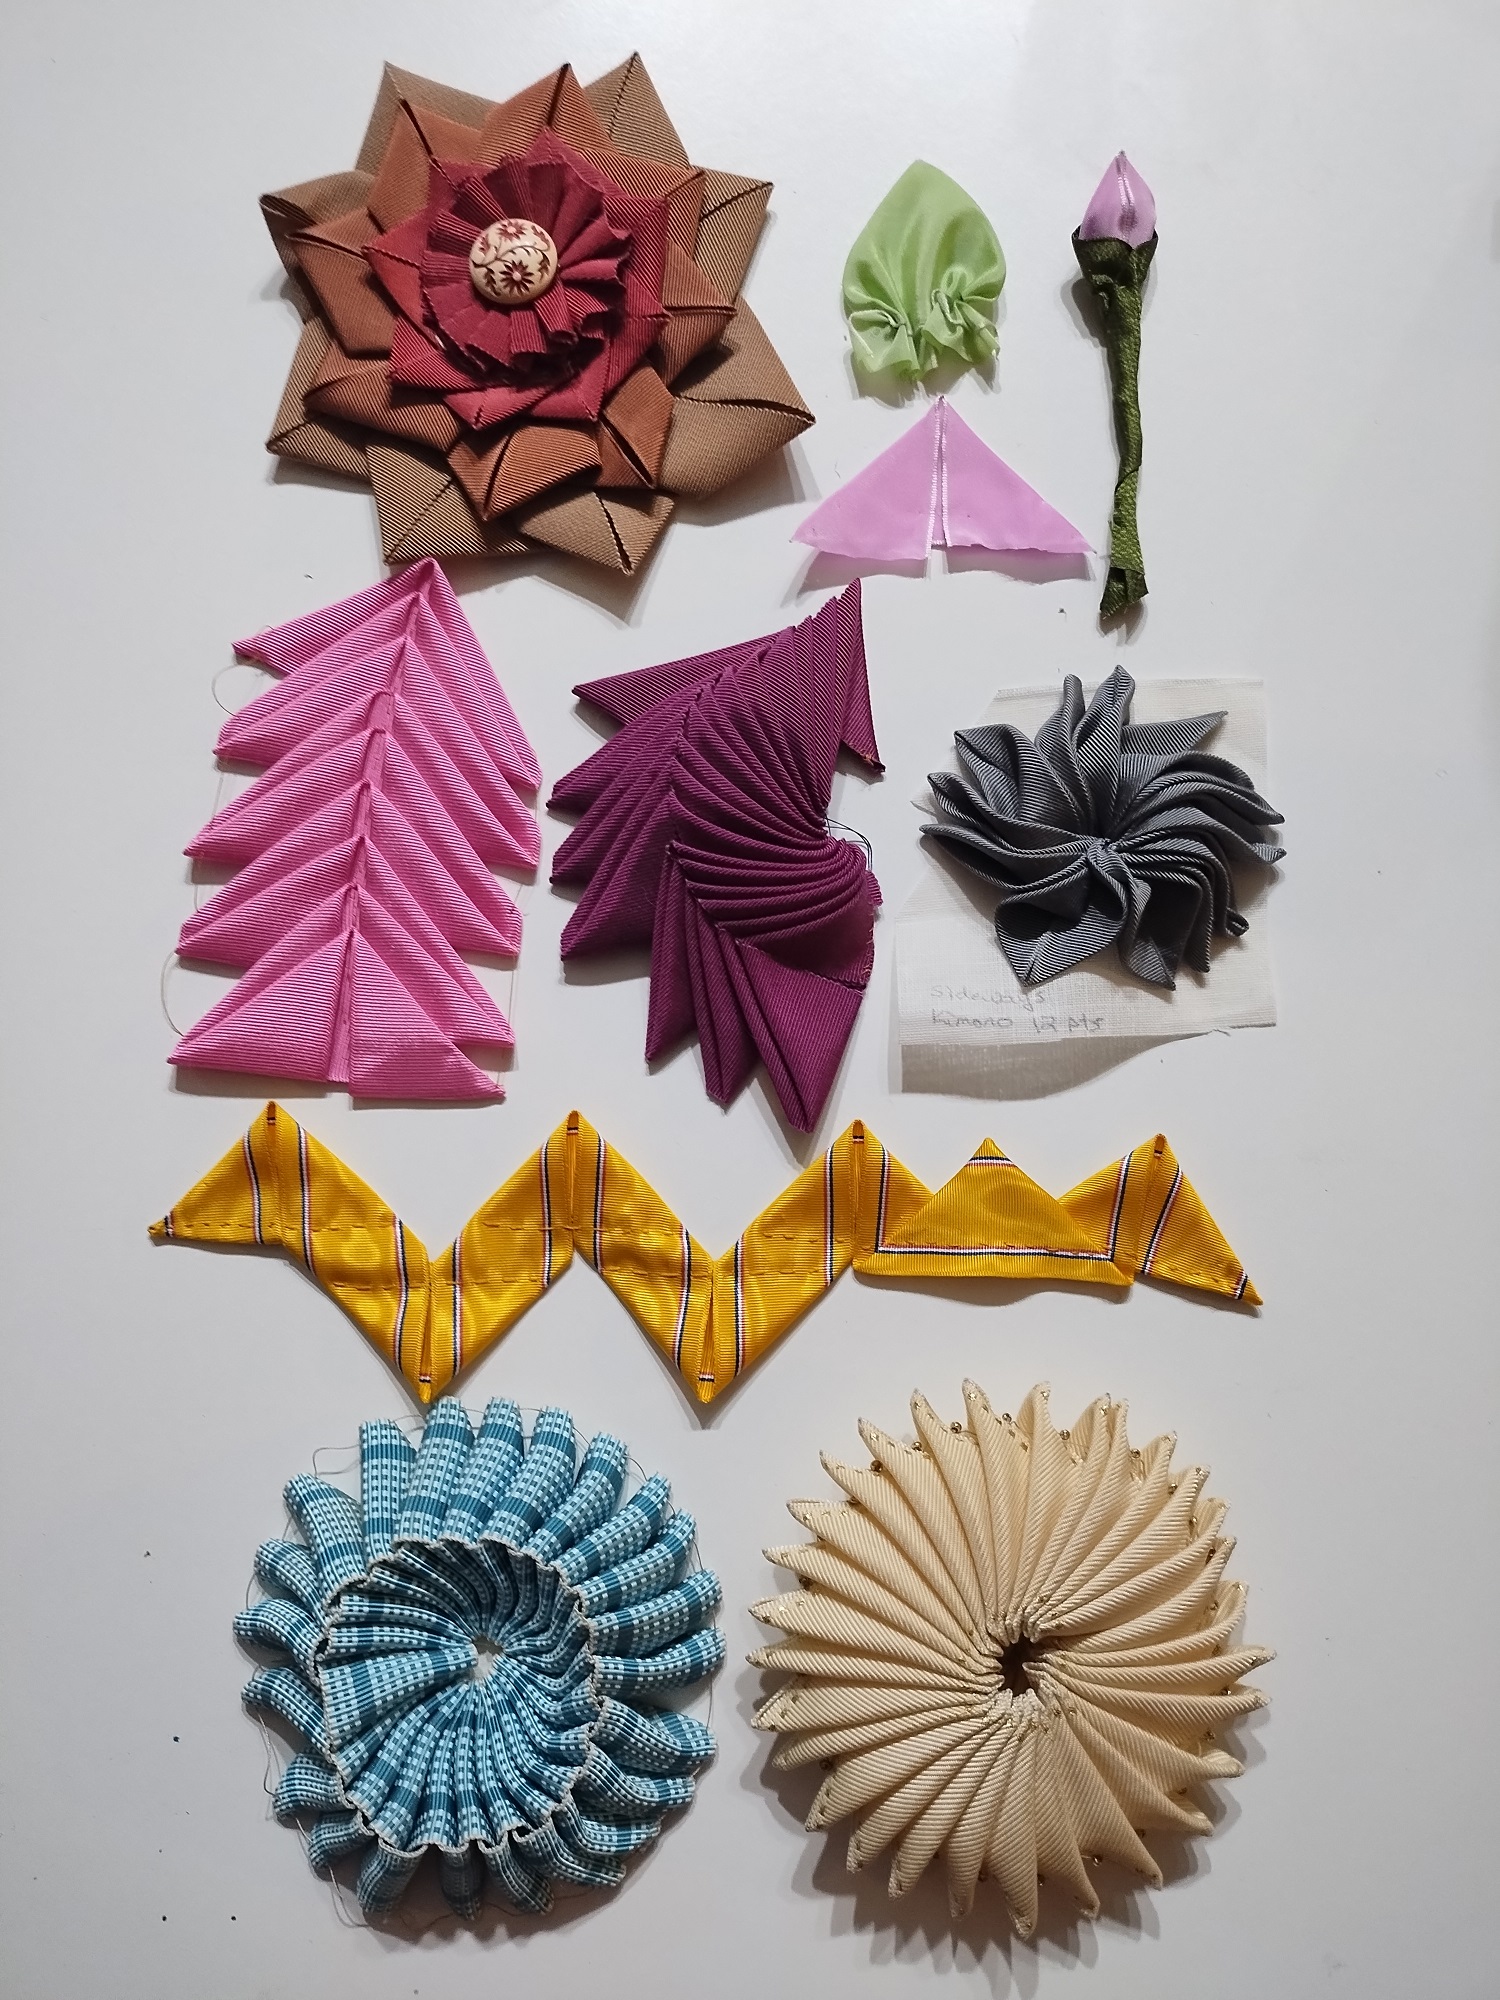
The Prairie Point motif can be used to make leaves, buds, flat trim, or cockades from ribbon. This class features a lecture/demo with instructional handouts for a myriad of ways to use the basic Prairie Point fold and time for students to make several samples. There will probably not be enough time to make samples of all the variations, but the knowledge and instructional handouts should enable students to duplicate all the styles. Examples will include: leaf, bud, running Prairie Point flat trim, basic Prairie Point cockade, extended Prairie Point cockade, folded Prairie Point cockade, and blunt Prairie Point cockade.
Students can purchase a kit of ribbons suitable for multiple samples or bring their own ribbon. A list of supplies, resources, and references will be sent out prior to class.
Instructor: Judith Hollenberger
Class Type: Workshop
Class Level: All
Material fees: N/A
Estimated expense for students excluding material fees: N/A
Instructor will Provide:
- handouts
- cardboard fabric bolts to use as work surface during class
- kits with sufficient ribbon for examples for purchase
- will send out list of supplies, resources, and references prior to class
Student provides:
- ribbon – rayon, grosgrain, petersham, or cotton preferred. Polyester ribbon can be problematic but may work if not stiff. Wired ribbon okay
- basic hand sewing kit – needles, thread, pins, ruler or measuring tape
- scissors that can be used for paper & ribbon
- gray check (optional if you want to treat your ribbon edges)
- pencil, pen, and/or marking tool such as fabric pen or chalk
Instructor Bio: Judith Hollenberger has experimented with many materials and techniques for design and ornamentation, but she found her true passion in ribbon work. From 18c balloon trim to 1920’s roses to 1940’s millinery bows, she’s done a bit of everything. She’s excited to share her love of ribbon and the myriad ways it can enhance your projects.
Session 3: 3:00 pm – 4:30 pm
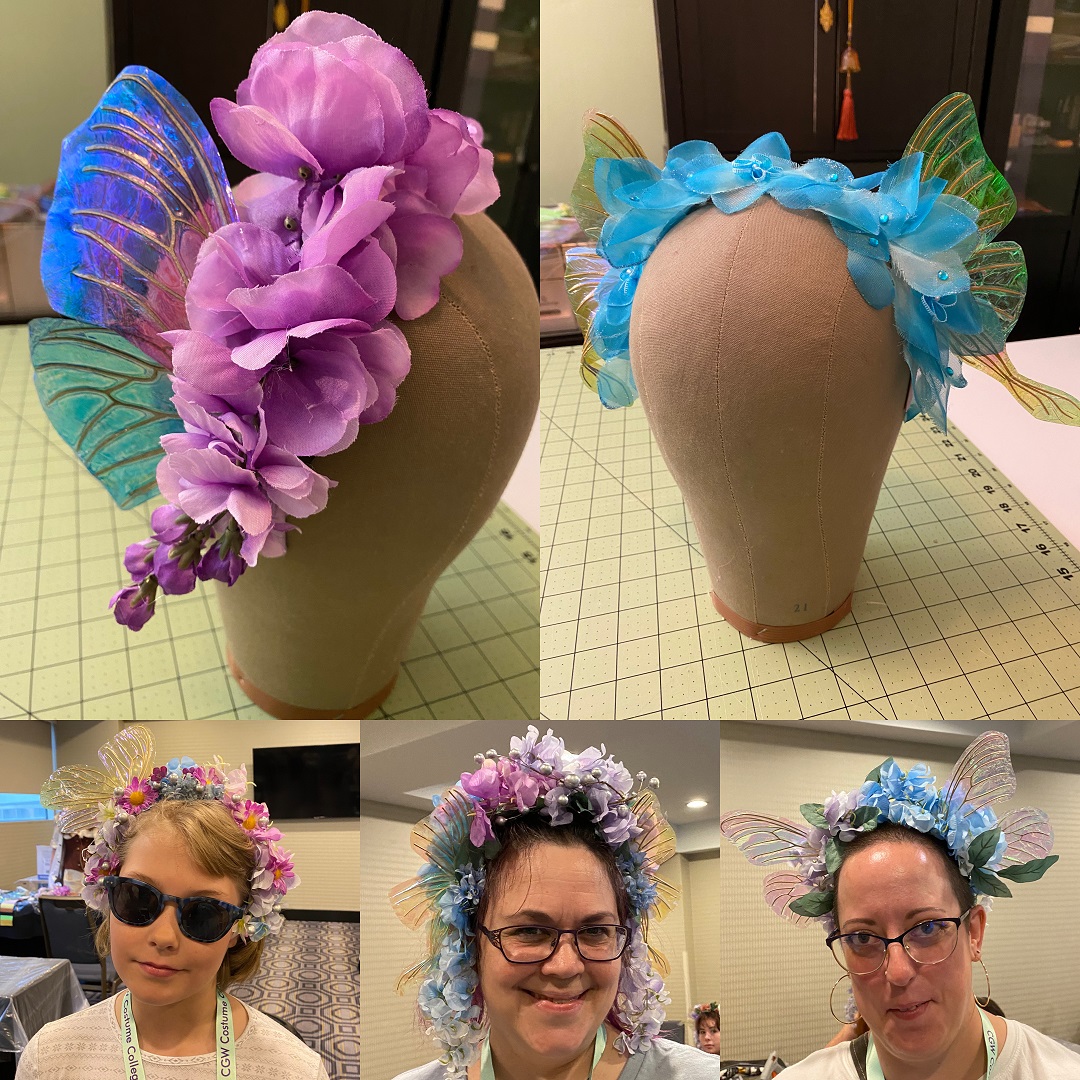
In this workshop students will make a floral and mini fairy wing headband/headpiece. The class will start with a demo of making iridescent mini wings using the Fancy Fairy Wings Tutorial method (by Angela Jarman). Then students will make their own headbands using provided mini wings and artificial flowers.
Instructor: Sahrye Cohen
Class Type: Workshop
Class Level: All
Material fees: $20
Estimated expense for students excluding material fees: N/A
Instructor will Provide:
- iridescent mini fairy wings
- artificial flowers
- ribbon covered headbands
Student provides:
- low temperature or multi temperature glue gun and glue sticks (high temperature not recommended for potential burns)
- craft scissors for cutting artificial flowers
- optional: hand sewing supplies (thread, scissors, needles
- artificial flowers will be provided but students may bring their own if preferred
Instructor Bio: Sahrye Cohen is a costumer and the co-author of the book, Make It, Wear It: Wearable Electronics for Makers, Crafters, and Cosplayers. She designs tech couture and upcycled fashion as Amped Atelier.
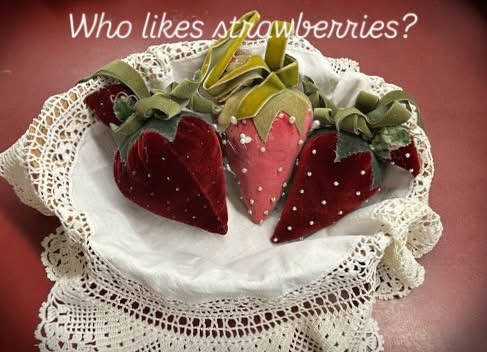
Who likes strawberries?
Come make a beautiful velvet strawberry, based on a 19th century original pincushion in the Lacis Museum collection. The strawberry can be a pincushion, sachet, or decoration. We will hand-sew a large silk velvet strawberry pincushion, as well as an adorable mini strawberry. We’ll learn several different sewing stitches, play with beading, and learn to tie beautiful bows.
Instructor: Catherine Scholar
Class Type: Workshop
Class Level: All
Material fees: $45
Estimated expense for students excluding material fees: N/A
Instructor will Provide:
- fabric
- ribbon
- thread
- millinery leaves
- stuffing
- beads
- needles
- needle threader
- glue
- pattern/instructions
- the fabric and ribbon will be cut and ready to use.
Student provides:
- embroidery scissors
- sewing pins
- beeswax for thread
- thimble if you use one
Instructor Bio: Catherine Scholar read “Little House on the Prairie” at age five and has been obsessed with historic clothing ever since. She learned to sew at her mother’s knee and to embroider at her grandmother’s. In high school she discovered vintage dance, the Northern Renaissance Pleasure Faire, and Dickens Fair, and was amazed to learn that she could combine her passions for dance, costume, history and theater. Catherine served on the board of the Greater Bay Area Costumers Guild for 10 years as Newsletter Editor, Events Coordinator, and President. She has studied fashion design and enjoys working from period dressmaking guides. Catherine has taught many costuming workshops for GBACG, Lacis, Renaissance Fabrics, 1886/Costume On, Costume Skills Institute, and Costume College.
This class will teach you how to costume on a budget: how to shop your closet and modify pieces that your already have, how to select pieces at thrift shops and clothing swaps that can be turned into costume pieces, and how to use your unique skills to create costumes that are as unique as you are!
Instructor: Michelle Atno-Hall
Class Type: Demo
Class Level: All
Material fees: N/A
Estimated expense for students excluding material fees: N/A
Instructor will Provide:
- examples and description of upcycled costume pieces for display
- handouts of how to modify jackets, dresses and skirts to be used as historical or fantasy costumes
- paper, pens and colored pencils for students to draw out their costume concepts
Student provides:
- optional: a piece of their own (skirt, jacket, shirt, etc.) that they want to transform into a costume piece
Instructor Bio: I first became a costumer ten years ago, when I joined the cast of the Great Dickens Christmas Fair and saw how expensive commissioning a Victorian costume could be! Since then, I have become an avid sewist, knitter, crocheter, and reenactor and, as a teacher of 30 years, am passionate about teaching others to create dream costumes that aren’t a nightmare for your pocketbook!
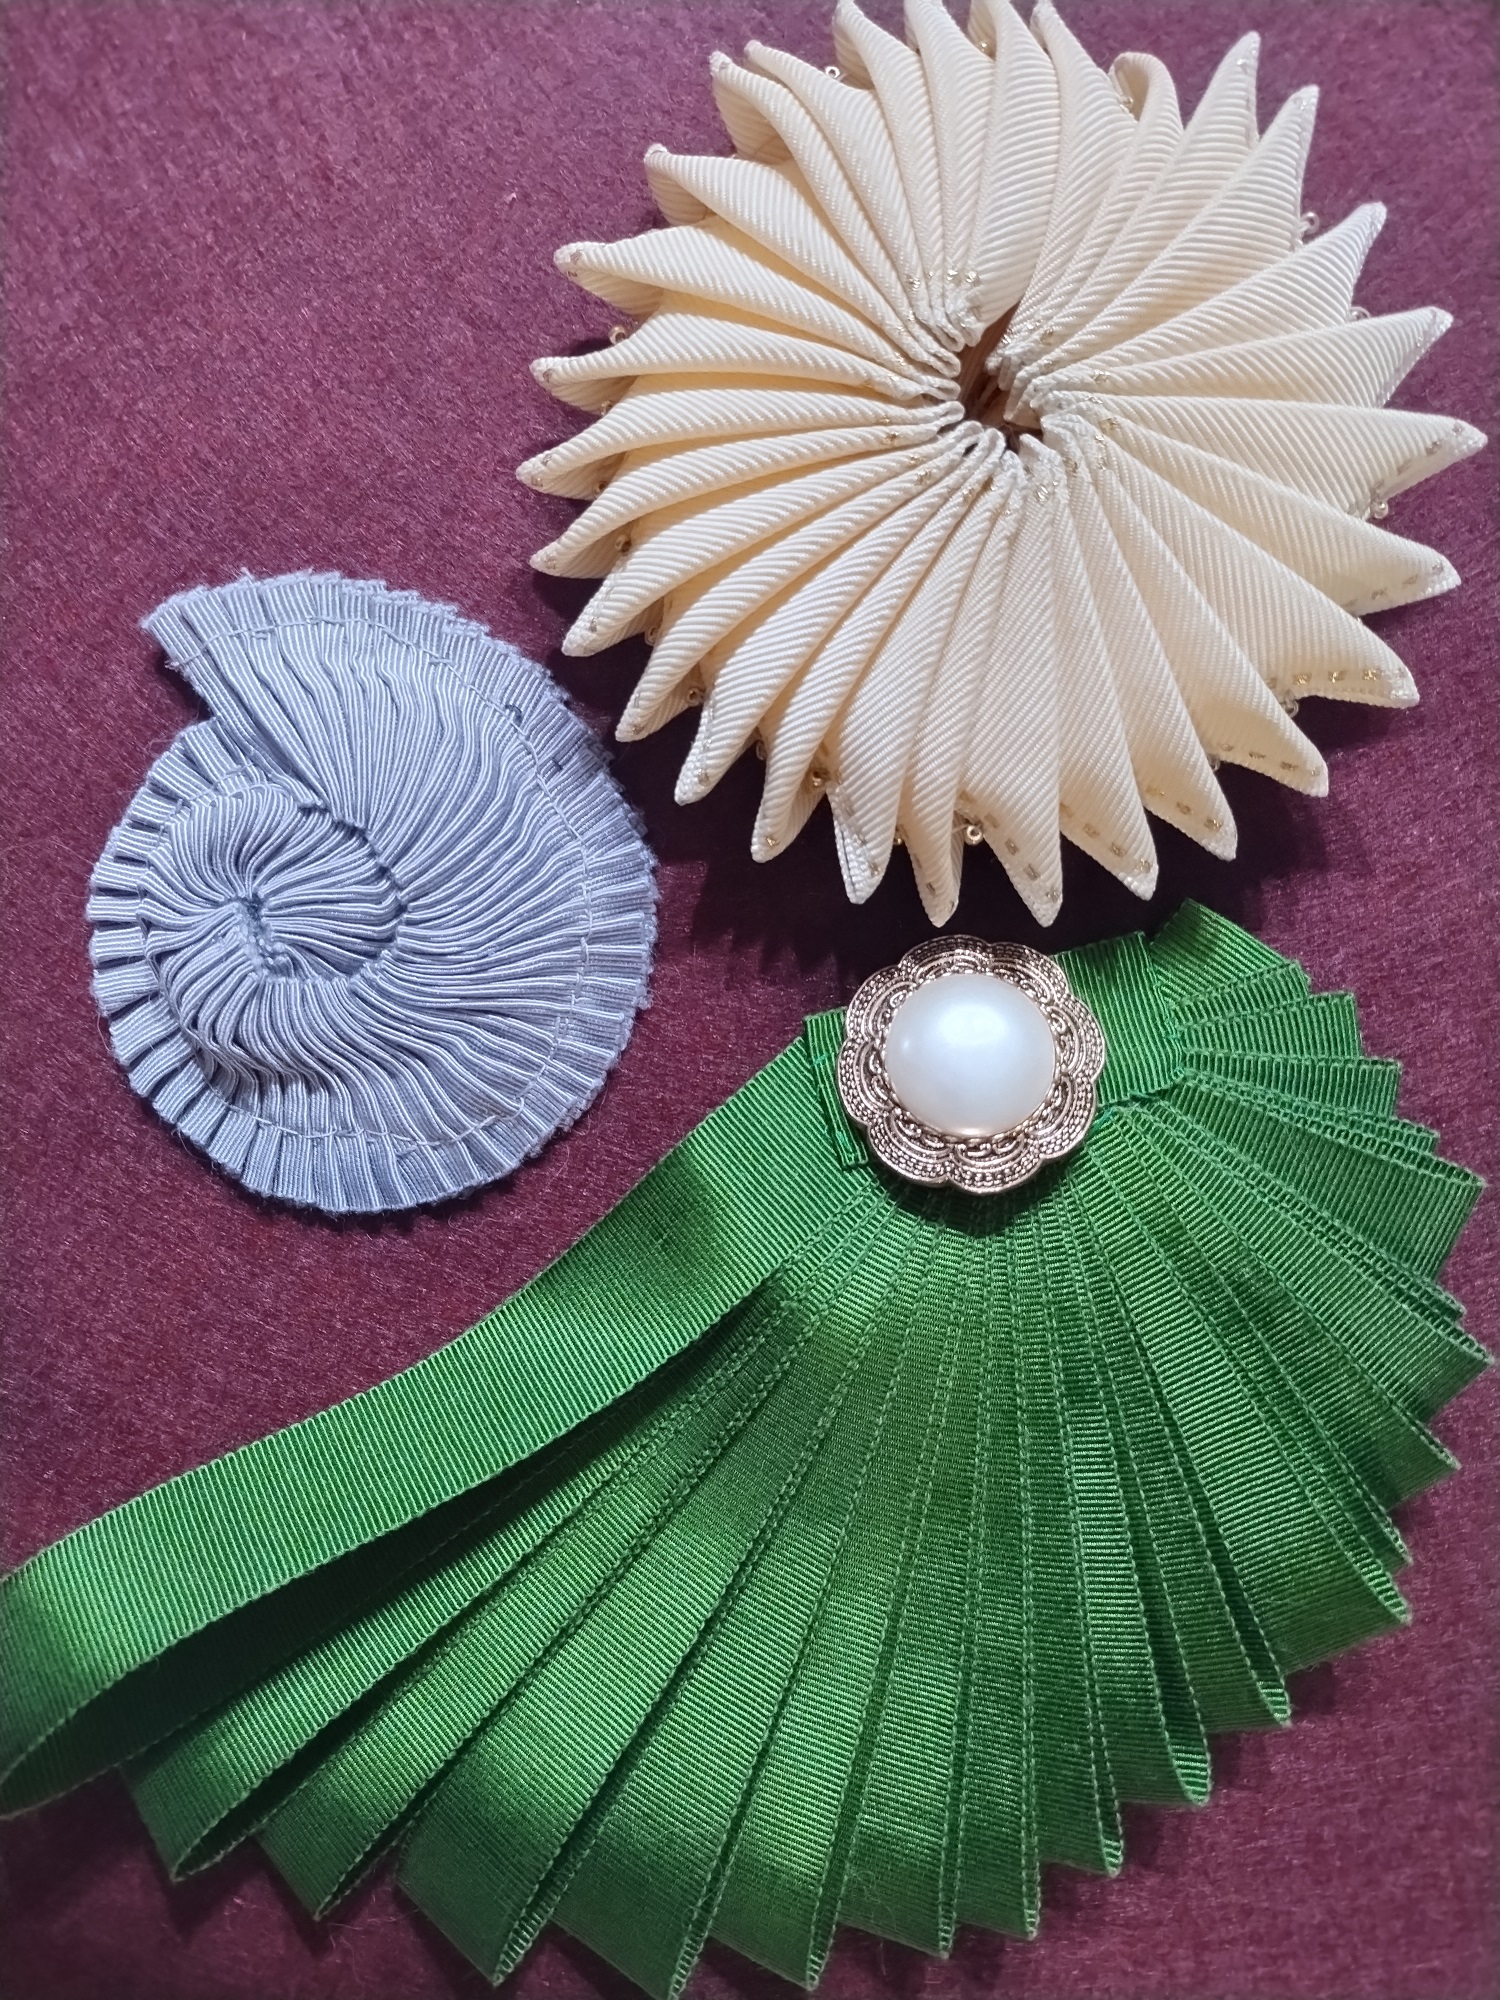
There are several ways to make nautilus cockades from ribbon, which are beautiful motifs that evoke nautilus sea shells. Students will make 3 types of nautilus cockades, suitable for use on garments, accessories, or millinery.
Students may purchase a kit of ribbons suitable for the work or provide their own. A list of supplies, resources, and references will be distributed before the class. Note: one of the styles requires a special pleating board, which will be available for students’ use during class.
Instructor: Judith Hollenberger
Class Type: Workshop
Class Level: All
Material fees: N/A
Estimated expense for students excluding material fees: N/A
Instructor will Provide:
- handouts; cardboard fabric bolts to use as work surface during class
- undercut pleater boards for use during class
- kits with sufficient ribbon for examples for purchase
- will send out list of supplies, resources, and references prior to class
Student provides:
- ribbon – rayon, grosgrain, petersham, or cotton preferred. Polyester ribbon can be problematic but may work if not stiff. Wired ribbon okay
- basic hand sewing kit – needles, thread, pins, ruler or measuring tape
- scissors that can be used for paper & ribbon
- fray check (optional if you want to treat your ribbon edges)
- pencil, pen, and/or marking tool such as fabric pen or chalk
Instructor Bio: Judith Hollenberger has experimented with many materials and techniques for design and ornamentation, but she found her true passion in ribbon work. From 18c balloon trim to 1920’s roses to 1940’s millinery bows, she’s done a bit of everything. She’s excited to share her love of ribbon and the myriad ways it can enhance your projects.
